FrSky Horus X10S (Express) - Remove Throttle RATCHET
To take full advantage of this radio, you must remove the throttle ratchet if you want to fly FPV quads. But what is it, and how do you do it?
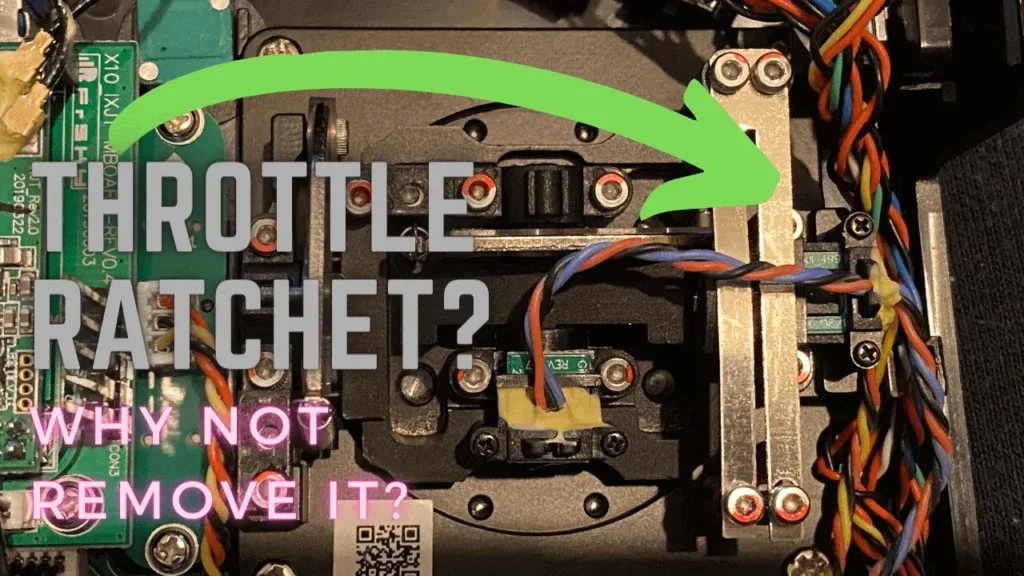
If you acquired a new remote controller for your FPV drone, and in this specific case, I am going to show you as an example, the Frsky X10S Express radio, you may have realized that the throttle is not smooth at all and behaves as it works on different “levels.” This happens because your remote controller has a throttle ratchet.
The throttle ratchet sometimes helps fly helis and fixed wings, but it is never useful when flying a quadcopter. You need your input sticks, including the throttle, to be as smooth as possible for an accurate flight. The throttle ratchet should be removed in this case. But how?
How do you remove the throttle ratchet from your Frsky X10S Express and other similar radio controllers?
You will have to open up the radio by removing the backside screws and unplugging the battery. Then locate your throttle, and you will notice this has two blades: One blade is for the throttle tension, while the second blade, with a dent in the middle, is for the throttle ratchet.
Lose the blade with the dent until you don’t feel the ratchet anymore, then adjust your throttle tension.
Well, this is the quick answer paragraph, but I strongly recommend you to keep reading for a simple, but an in-depth guide on how to remove the throttle ratchet from the Frsky x10s express and/or similar radios.
Also, I’ve managed to make a YouTube video covering all these steps; therefore, this guide is available both in text and video format.
How do you remove the throttle ratchet on the Frsky Horus X10/S/Express versions?
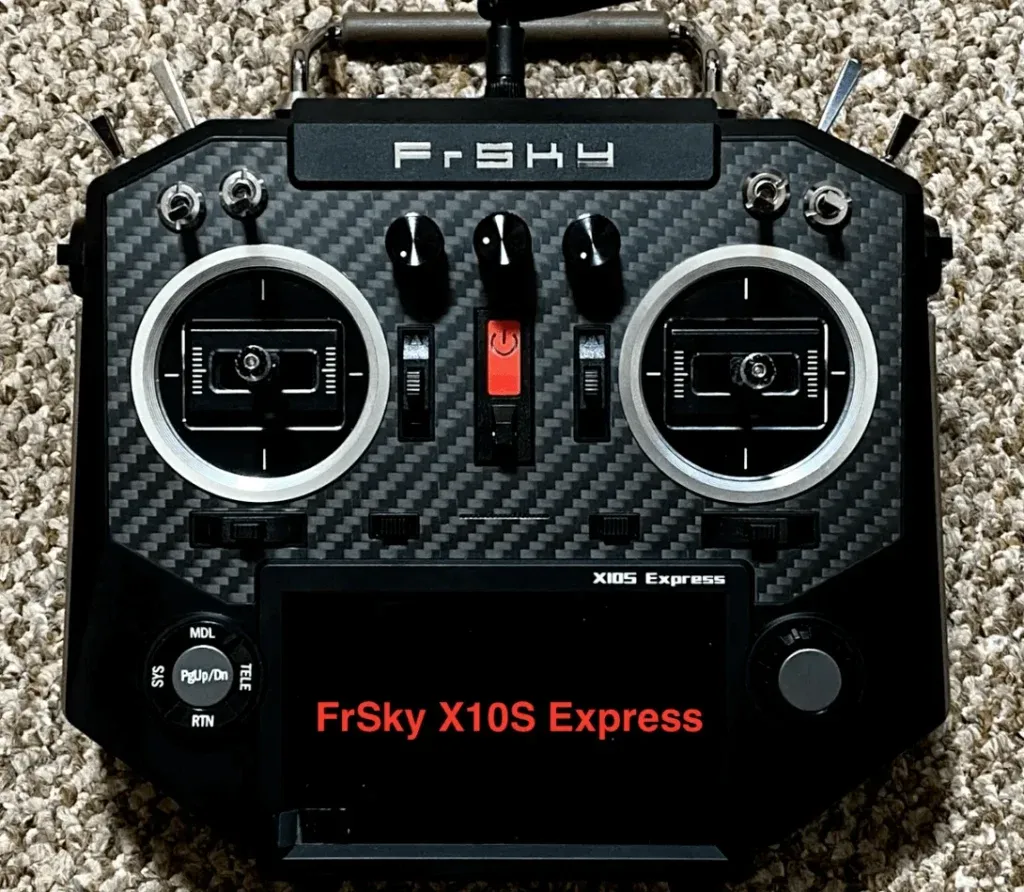
As mentioned above, the advantage of having the throttle ratchet in a radio transmitter is mainly related to flying UAV planes and helicopters and can have a massive disadvantage in flying an FPV quad drone, in particular in acro mode.
That is why MOST of the radio controllers should come with the throttle ratchet ‘on’, as those radio controllers are made in mind to be used mainly for fixed wings and helis, but can be easily configured for quads.
Removing the throttle ratchet from a radio transmitter will allow the pilot to perform smoother maneuvers on the throttle and maintain a stable and accurate altitude when flying.
Removing the throttle ratchet does not mean removing any physical device from the radio, but loosening one simple screw for one of the throttle blades not to act anymore on the throttle gears.
A throttle device with a ratchet should have two blades and two gears on the throttle.
» RELATED: FrSky Horus X10S with FPV Simulators
So, I guess it’s time to do this step by step and help you through it, even with images.
Step 1 – Opening up the FrSky Horus x10s Express.
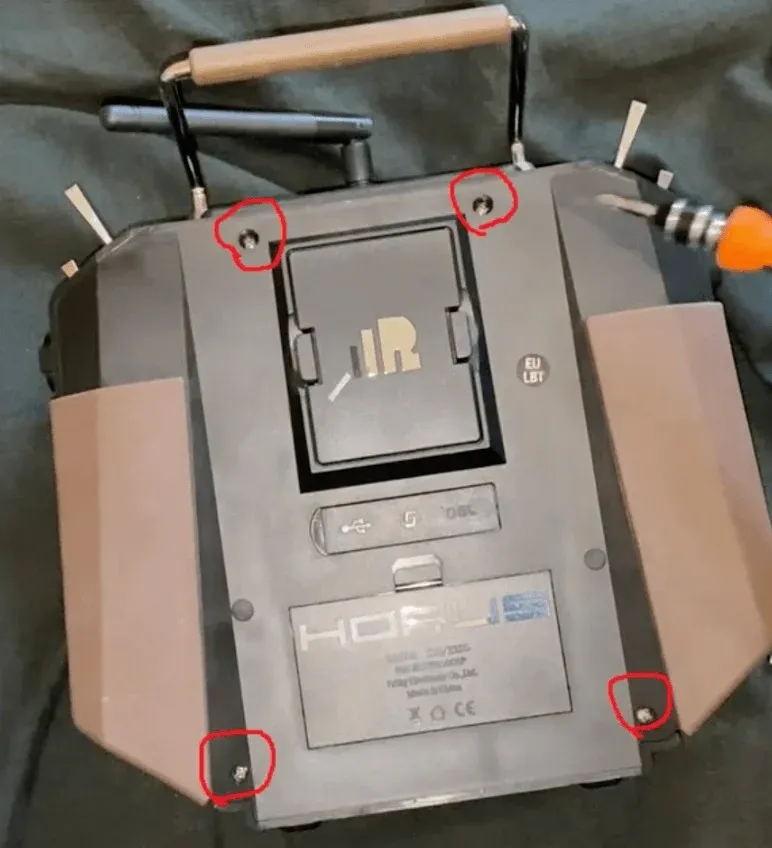
When you turn around your radio on this model on the backside, there should be four screws, one in each corner, as shown in the photo above.
You can use a simple Phillips screwdriver to remove these screws.
Unscrew those and open up the battery cover, and remove the battery. Be careful when you remove the battery; there is a connector directly to the motherboard.

You can easily remove the connector with either your fingers or a small tool that can push out the connector safely.
After you remove the screws and the battery on this Frsky x10s express model, you can go and open it up from the edges...
Don’t aggressively pull it out, as you don’t want any wiring stuck in the back cover.
» RELATED: Is the DJI FPV Remote Controller 2 any Good? (Review & Guide)
Step 2 – Locating the throttle ratchet on Frsky Horus x10s Express
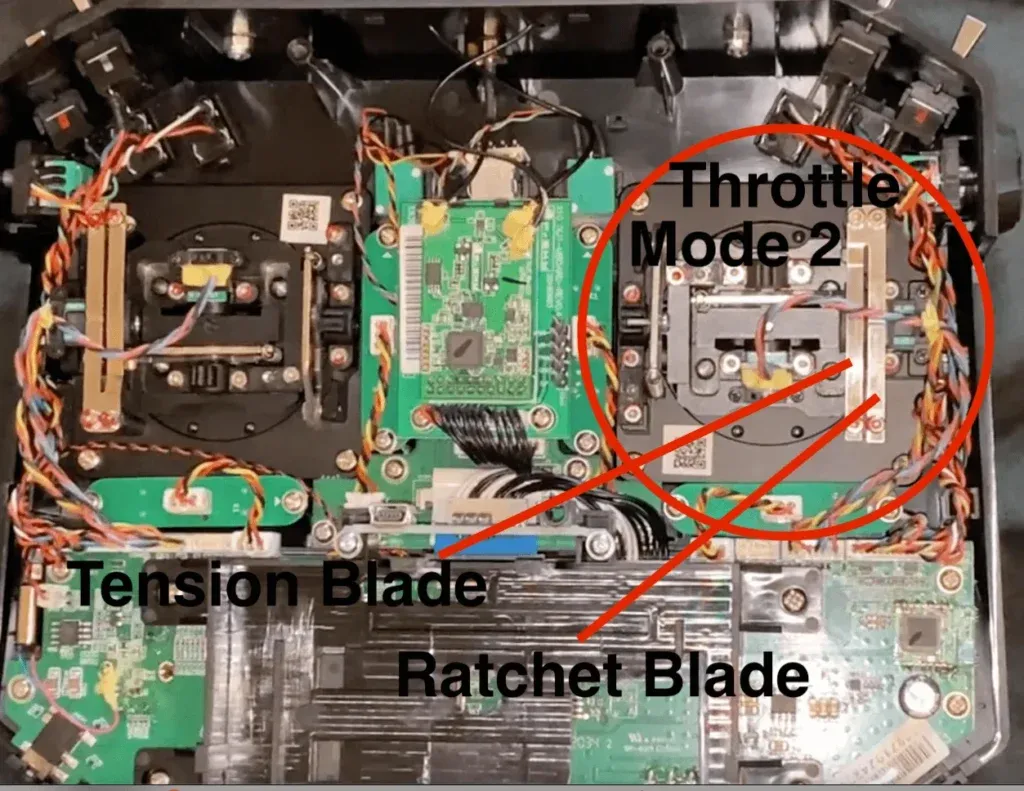
Before you locate your throttle ratchet, you must first locate the throttle.
» RELATED: DJI FPV Remote Controller 2 with FPV Simulators
For a mode 2 radio (standard), the throttle gear is on the left side; therefore, after you flip it, this should obviously be on the right side, as seen from the backside.
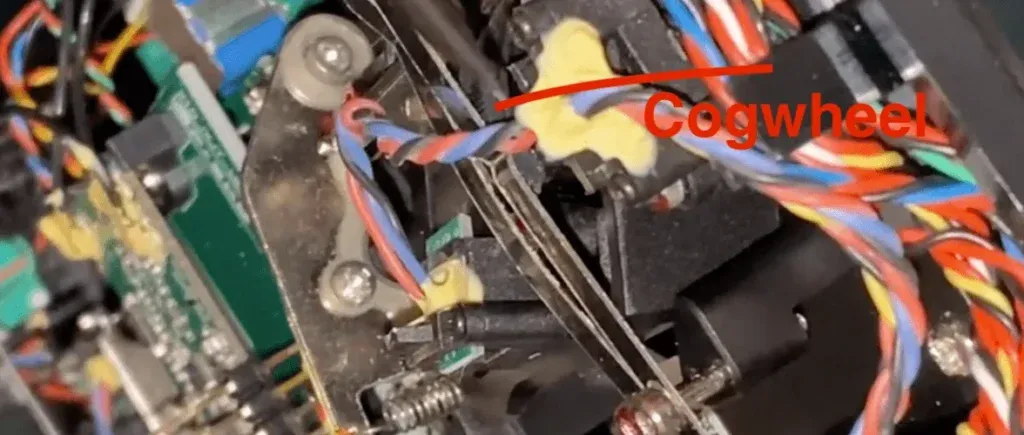
- One of the gears should be a smooth wheel, and the other a cogwheel.
- One blade is smooth throughout its surface, while the other has a dent in the middle.
- The throttle ratchet is the blade with the dent in the middle, which acts on the cogwheel.
Step 3 – Loosening the throttle ratchet screw and adjust the throttle “strength.“
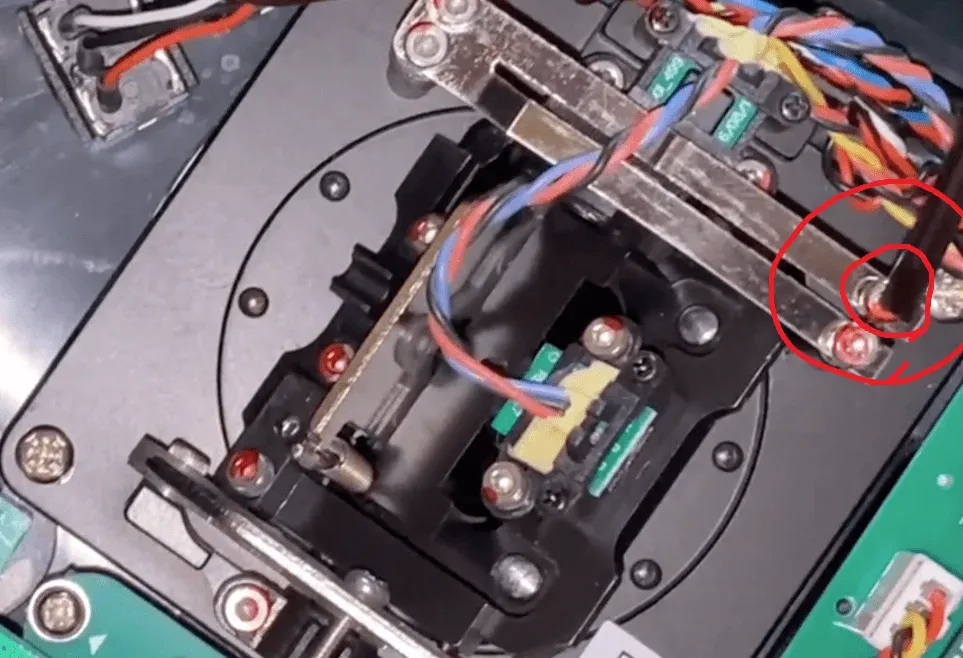
Lowering the tension on the blade with the dent so it doesn’t act on the cogwheel will generally smooth out the throttle.
However, if you do this, the tension of the throttle is lowered; therefore, you must tighten up the first blade, which acts on the smooth wheel, a bit.
The first blade is indeed the throttle tension. Don’t overforce it but neither underdo it.
Tight up the throttle tension and test your throttle from the radio so this is not loose at all when you hold the controller vertically (e.g. this doesn’t fall by itself)
» RELATED: How to Adjust Gimbal Tension on FPV Radio Transmitters
Additional Information
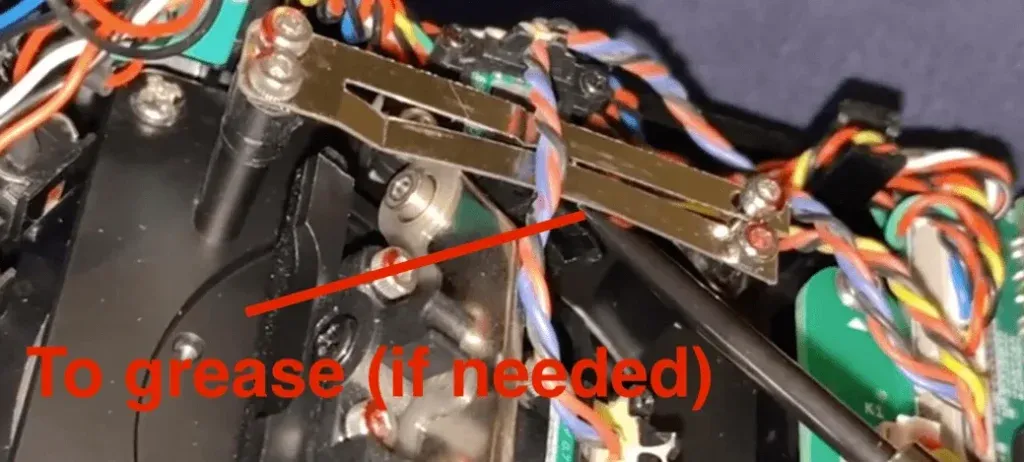
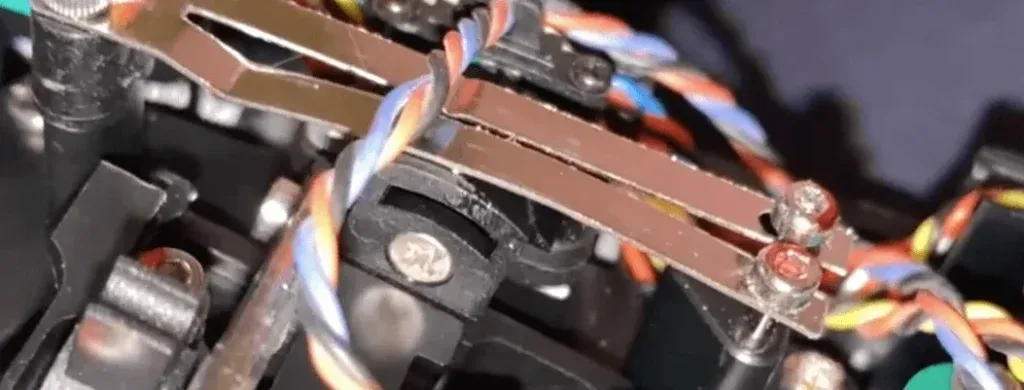
Due to a higher tension of the throttle blade acting on the throttle gear to compensate for the missing tension from the ratchet, you may feel that the throttle may be slightly sticky if acted very lightly upon.
What I’ve done by myself (not following anyone’s guide) is that I applied a micro drop of grease (WD-40) on a screwdriver and then applied it on the smooth gear from the throttle in order to smooth it out even more.
Do not do this if you think your throttle acts fine enough. This is just an addition to smoothing out the throttle, and you should be careful about making the decision to do it or not.
» RELATED: Large vs. Gamepad Style Radio Transmitter in FPV
Conclusion
This is not hard, is not difficult at all to remove the throttle ratchet from the FrSky Horus X10S Express.
As for other x10 versions, these should have similar implications of following this guide and should not be different.
The process for totally different radios may differ, but the ratchet and the gear should generally be the same.
Thank you very much for reading this guide, and I hope it’s been helpful.
Update: After two years since I wrote this article, I still have this remote controller and use it regularly. I have updated this article as of November 21st, 2023
» RELATED: Are FPV Drones Becoming More Popular?


