DJI FPV Remote Controller 2 with FPV Simulators
The DJI FPV Remote Controller 2 is the only radio transmitter compatible with the DJI FPV and Avata drones. But how does this RC works with FPV simulators?
If you have acquired the DJI FPV or DJI Avata drone, then the DJI FPV Remote Controller 2 role is to fly those FPV drones. It may even work with some other DJI transmission system-based FPV quads.
But using the DJI FPV Remote Controller 2 with FPV simulators is a great way to start flying without risking crashing your drones, an excellent way to keep practicing and refining your FPV skills.
However, let’s answer the main question, and then we can get into the section, shall we?
The DJI FPV Remote Controller 2 can be used with most FPV simulators, both on Windows PCs and Macs. I have personally tested the controller with a large number of simulators, and it proved to work just fine, although there’s a learning curve, and with MacOS devices, there could be connectivity issues.
Now, let’s divide this topic by using the DJI FPV Remote Controller 2 with different simulators, how to connect and configure, and what else you need to know.
Why DJI FPV Remote Controller 2 with FPV Simulators?
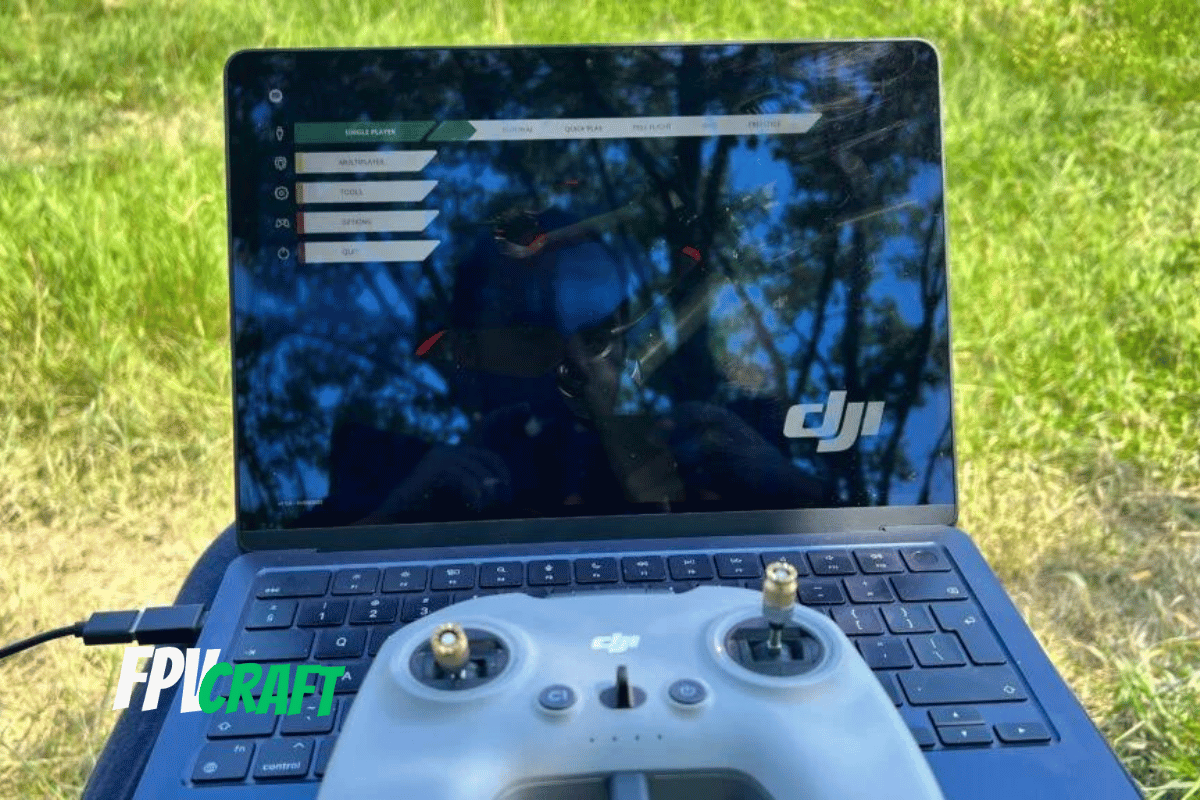
The DJI FPV Remote Controller 2 was created for specific use by DJI for their DJI FPV and Avata drones. But as we mentioned, it can also be used with a few other custom drones; hence, it hosts a digital DJI video transmitter.
But be aware that not all DJI VTX are fully compatible with the DJI FPV Remote Controller 2. This changed along the way with many firmware updates.
Leaving this aside, another practical use of this controller is, in fact, to use with FPV simulators to train and practice, improve your skills, or simply have fun when you can’t fly your drone outdoors.
As mentioned in the answer paragraph, the DJI FPV Remote Controller 2 is fully compatible with different simulators. But not all simulators may work with it.
That’s why I strongly recommend keeping reading if you want to use this controller with a specific simulator. We have a few of them covered.
But if you have newly acquired the DJI FPV Remote Controller 2, you may notice that, like a standard drone remote controller, the throttle will middle itself.
We don’t want that. In FPV, the throttle spring HAS TO BE removed, especially if you want to train in simulators with this controller to learn how to fly the DJI FPV or Avata in manual mode.
» RELATED: How to Learn FPV in Simulators (Ultimate Guide)
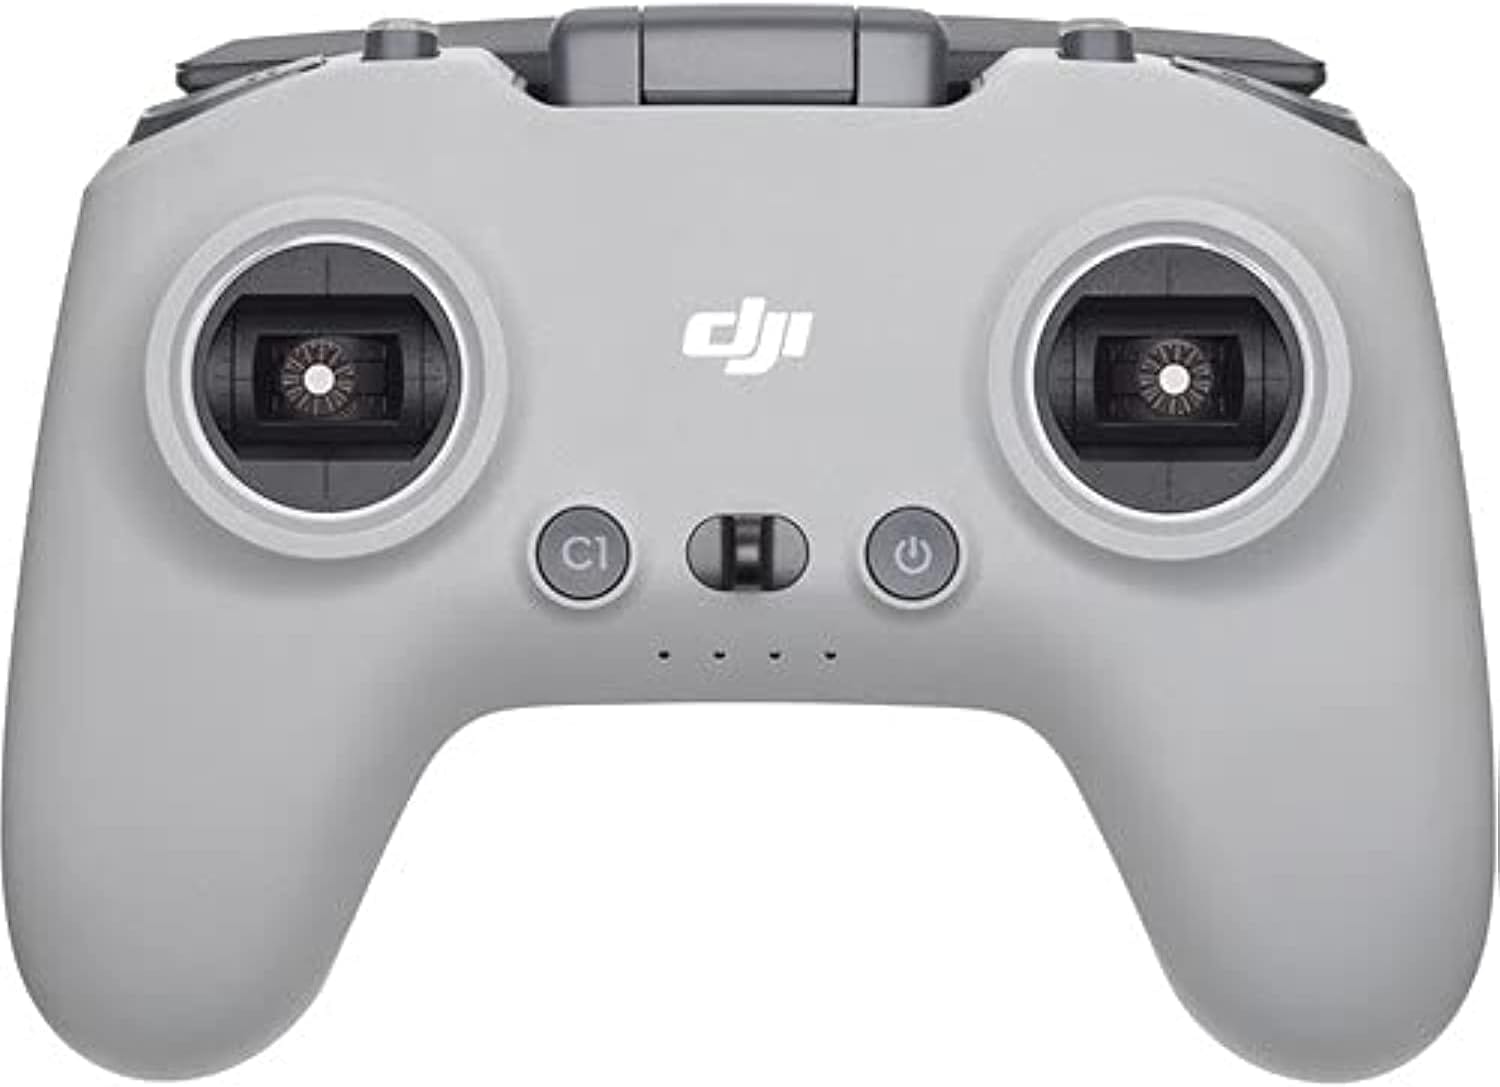
DJI FPV Remote Controller 2
The DJI FPV Remote Controller 2 is compatible with the DJI FPV drone, DJI Avata, and many FPV Simulators such as Liftoff, Velocidrone, DRL, etc.
This is an affiliate link. We earn a commission if you make a purchase, at no additional cost to you.
How to remove the throttle spring tension for DJI FPV Remote Controller 2

This is slightly technical, but anyone can do it, and it will require only a few minutes of your time.
As you turn the controller over, on the backside on the right (for mode 2), you have a rubber pad that can be detached.
You will also see marks printed as F1 and F2 near two holes.
You should have been provided with an H1.5 hex key with your kit.
- When F1 is tightened, the control resistance increases
- When F1 is loosened, the control resistance is decreased
- When F2 is tightened, the recentering is disabled
- When F2 is loosened, the recentering is enabled.
Your step is to disable the throttle recentering on your DJI FPV Remote Controller 2 and increase a bit the control resistance to ensure the throttle is not too loose. It has to be able to stay in any position you place it.
If you want, have a look at the steps from this article on how to remove the throttle spring tension from your DJI FPV Remote Controller 2.
When you buy the controller, you should also have a technical booklet that shows these steps.
Connecting the DJI FPV Remote Controller 2 to Windows PC and Mac
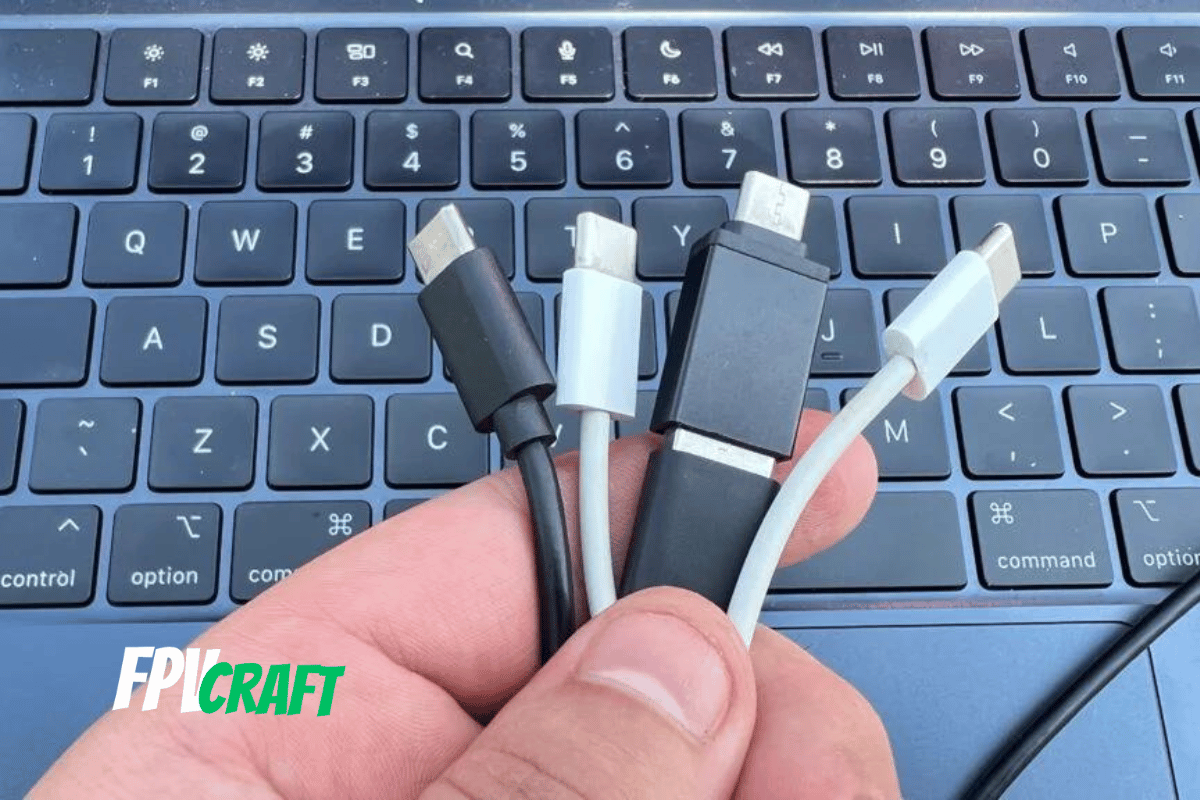
The next step for you would be to simply connect the DJI FPV Remote Controller 2 to your Windows computer or a Mac, whether it is a MacBook, Mac Mini, or iMac.
Note: The DJI FPV Remote Controller 2 cannot be connected wirelessly or via Bluetooth to the computer.
Because of this, we will need a data cable (as the one provided with the controller) with one end to be USB-C to connect to the controller and the other end, USB-C or USB-A to connect to your computer, depending on your port input.
Neither on Windows PC nor Mac, the DJI FPV Remote Controller 2 will not require any additional drivers or setup to function. It’s as simple as plug-and-play.
However, two issues can happen:
- If you try to connect your controller to a Mac computer via USB-C to USB-C, it may not work. I have written an entire article about connecting the DJI FPV Remote Controler 2 to Mac, and if you encounter this problem, there’s a solution.
- If the DJI FPV Remote Controller 2 is connected successfully to your computer but won’t be recognized in any simulators, no matter what you do, it is because the firmware of the controller is too old. You will have to update your DJI FPV Remote Controller 2 firmware to fix the issue.
Other than that, it would not matter if you first turn on your DJI FPV Remote Controller 2 before or after you connect it to the computer, but I always do it before.
But it would matter if you turn on and connect before entering the simulator or after; some simulators will require the remote controller to be first connected and then to start it, or it won’t be recognized.
DJI FPV Remote Controller 2 with Liftoff Simulator
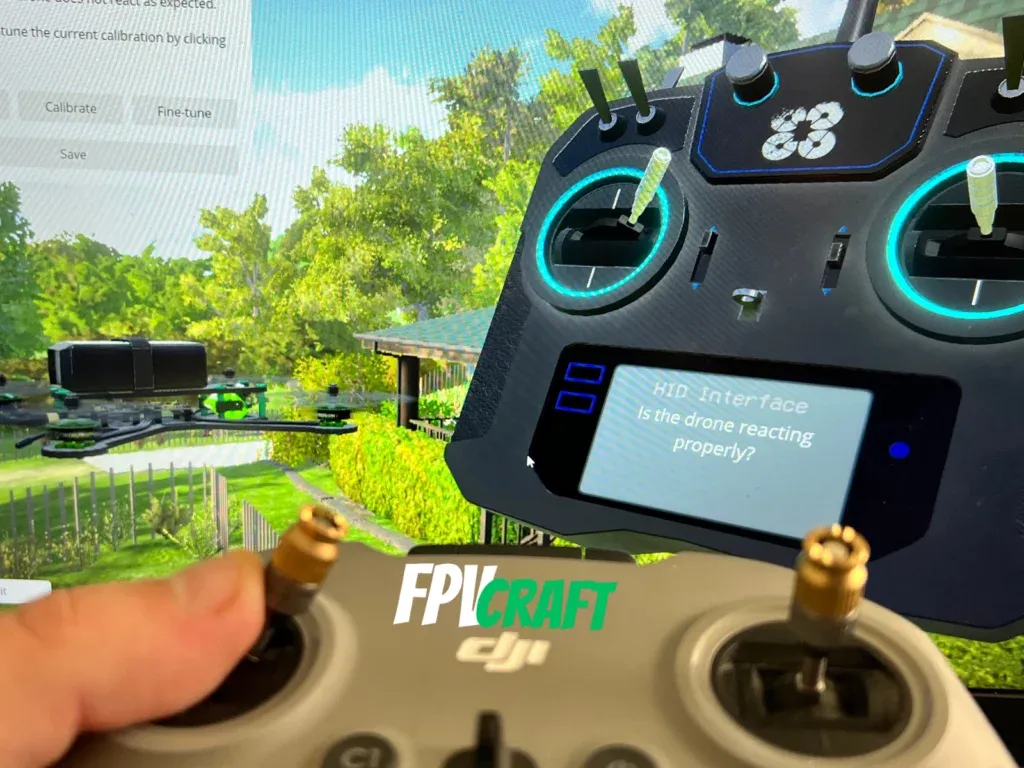
I have used the Liftoff as my main FPV simulator from the very beginning with my DJI FPV Remote Controller 2, and every time, it worked flawlessly, both on Windows PCs and Macs.
If you want to use this controller with Liftoff, you will have to get through first-time setup and calibration, which barely takes a minute to complete, before starting any maps.
How to use the DJI FPV Remote Controller 2 with Liftoff?
- Connect the DJI FPV Remote Controller 2 to the Windows PC or Mac and turn it on.
- Enter Liftoff Simulator
- In the main menu, go to OPTIONS > CONTROLS > CONTROLLER.
- Press Calibrate and follow the on-screen tutorial
That would be all. The controller should be recognized without any issues; if you have issues with connectivity, refer to the above two points from connecting the controller to the Mac.
Now, you can train in Liftoff without issues.
» RELATED: Can you use DJI FPV Remote Controller 2 with Liftoff Simulator?
DJI FPV Remote Controller 2 with Liftoff Micro Drones
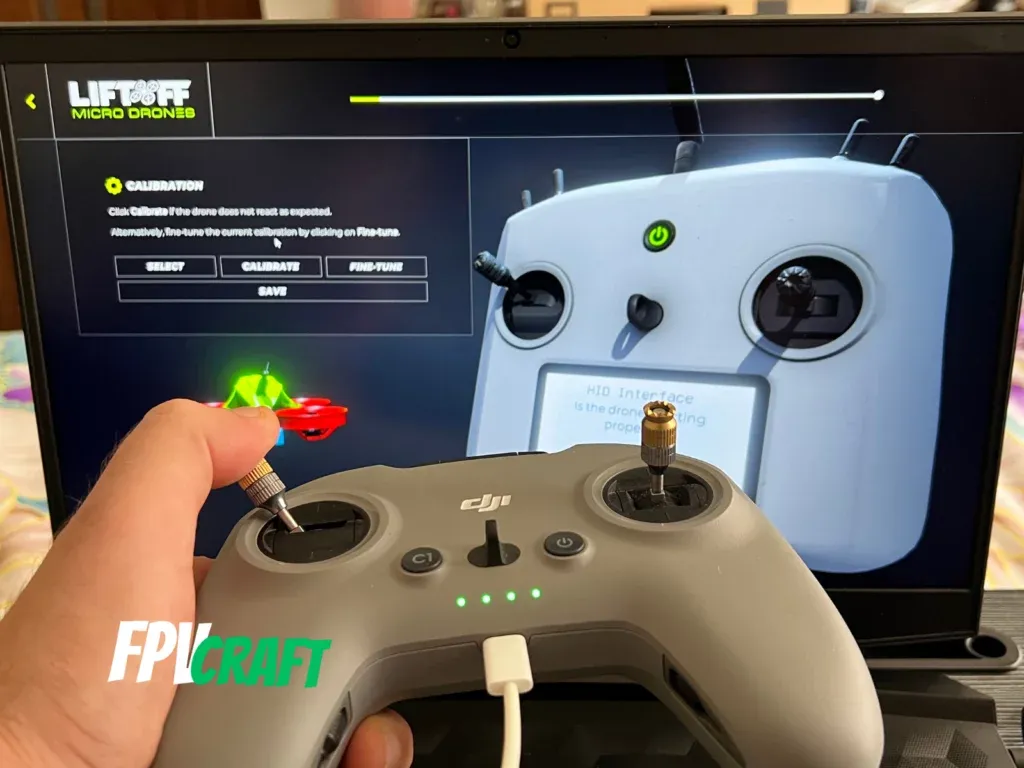
The Liftoff Micro Drones is an entirely new simulator and not an add-on to the Liftoff and is based on flying all types of micro drones in many different scenarios and places.
I have used the Liftoff Micro Drones for quite a bit without issues, both with this controller and my x10s Express.
To set the DJI FPV Remote Controller 2 with Liftoff Micro Drones, follow these steps:
- Connect the controller to the Windows PC or Mac and turn it on.
- Start the simulator and wait for the main menu to pop up
- Go to Options > Controller
- Press Calibrate and follow the on-screen tutorial
The process for setting up the DJI FPV Remote Controller 2 with Liftoff Micro Drones is somehow similar to the original Liftoff Simulator.
DJI FPV Remote Controller 2 with TRYP FPV
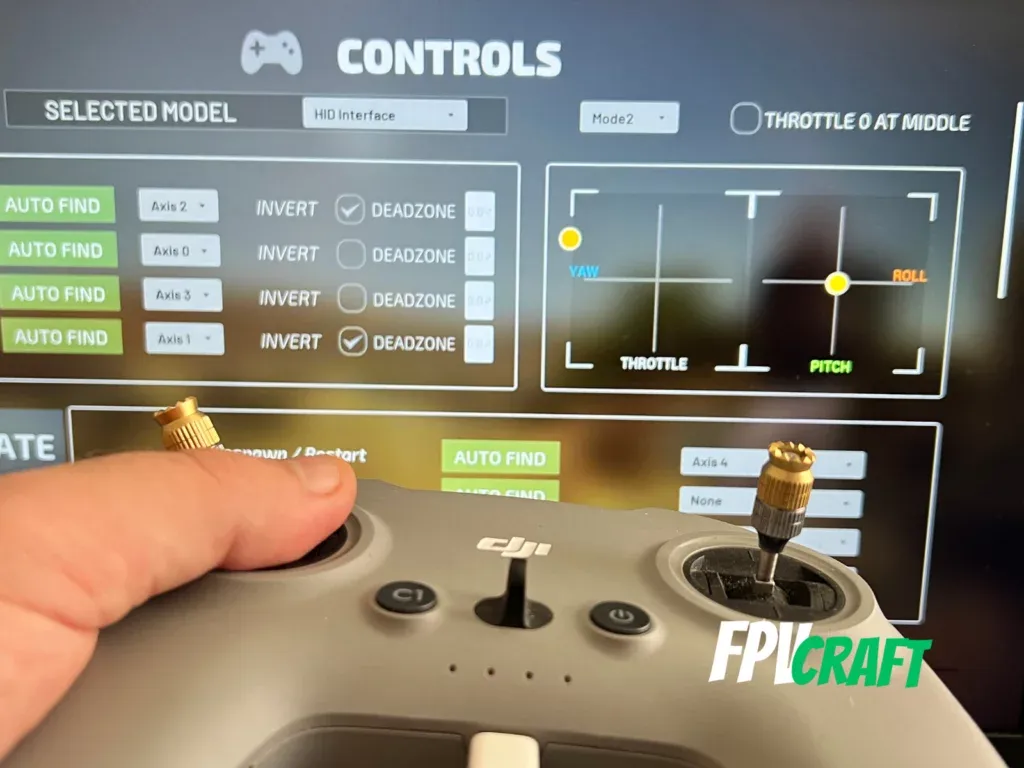
After a while of using only the Liftoff simulator, I purchased a lot more simulators, including the TRYP FPV.
TRYP is great; it has some room for improvement, but it’s massive, and the maps are simply enormous. You can have a lot of fun with TRYP FPV.
But how do you connect your DJI FPV Remote Controller 2 with TRYP FPV?
- Connect the controller to the computer (either Windows PC or Mac)
- Start the TRYP FPV Simulator
- Within the main menu, go to OPTIONS > CONTROLS.
- Select the model “HID Interface” or how it is named for you. If this doesn’t pop out, or even if it does, press CALIBRATE.
- Follow the on-screen tutorial to calibrate the DJI FPV Remote Controller 2 with TRYP FPV.
- Afterward, on the same menu, you will have to map the axes for throttle, roll, yaw, and pitch.
- You can manually do that or simply press “auto find” and push the axis of your controller joysticks to set.
- Sometimes, you have to “invert” the axis; this, you will have to figure out for yourself because each time, it maps differently.
- Set the DEADZONE to 0.00; the DJI FPV Remote Controller 2 has no dead zone on the joysticks.
- Enable always auto-arm and disable throttle 0 “at the middle.”
It may look slightly complicated, but I’m sure you can successfully connect your controller with TRYP FPV.
Here’s an image with throttle, yaw, pitch, and roll original axes on the controller mode 2.
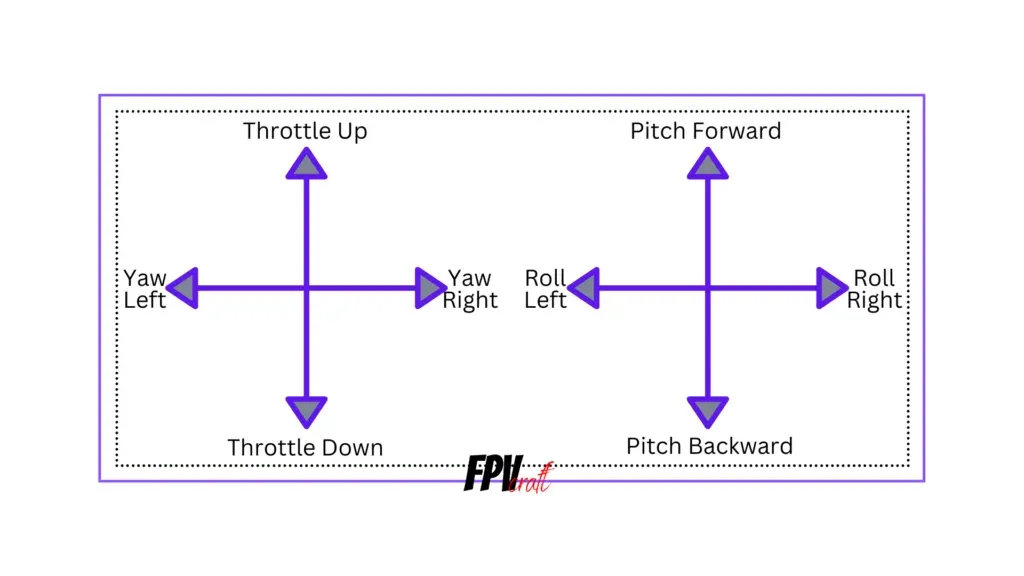
This setup is required only to be done once, and you can use the DJI FPV Remote Controller 2 with TRYP FPV as much as you like.
You can also map the respawn/restart to axis 4 if this is the axis where your cogwheel has been assigned.
» RELATED: Does TRYP FPV work with DJI FPV Remote Controller 2?
DJI FPV Remote Controller 2 with Uncrashed FPV
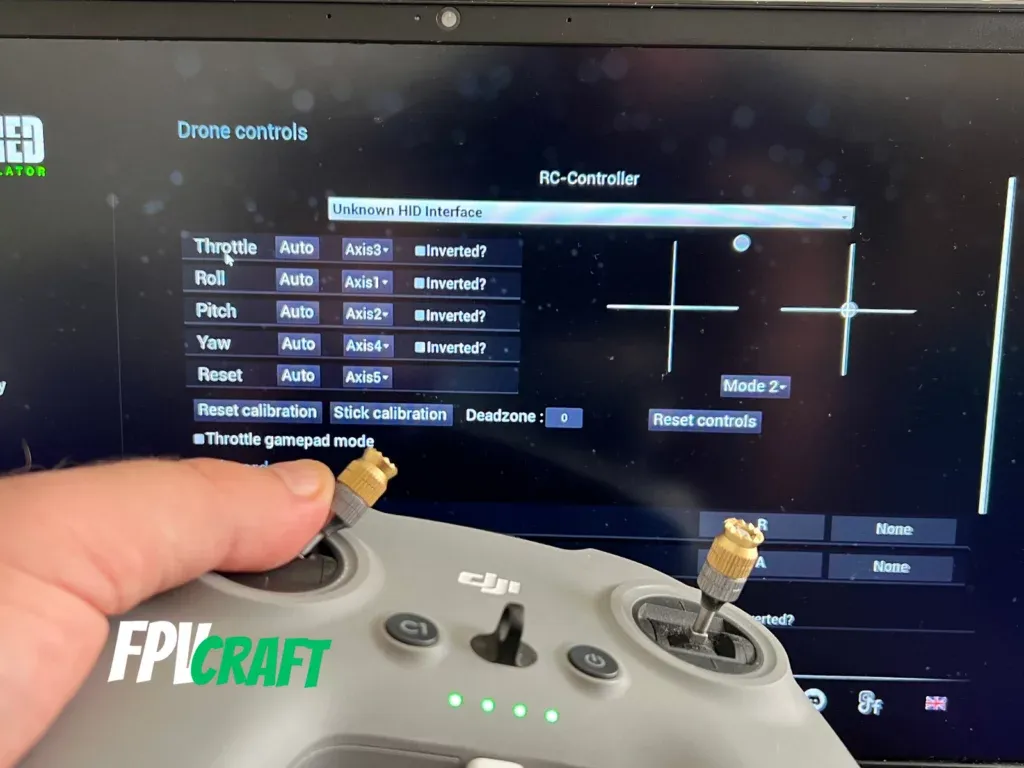
I love Uncrashed FPV and how this simulator works; with all the effects and settings you can modify for a drone and even the simulator physics, it is one of my top FPV simulators.
Personally, I never had an issue with using the DJI FPV Remote Controller 2 with Uncrashed. It does require a first-time setup, but the controller works perfectly fine.
How do you set up the DJI FPV Remote Controller 2 with Uncrashed?
- Connect the DJI FPV Remote Controller 2 to either a Mac computer or Windows PC and turn it on.
- Start the Uncrashed FPV Drone Simulator
- In the main menu, go to “Controls.”
- Press “Stick Calibration” and follow the on-screen guide
- In the end, ensure each axis is set correctly to the throttle, roll, pitch, and yaw. You can also set the reset on the cogwheel.
- If required, invert the axis; follow the graphics represented to ensure proper functionality of the controller.
The entire process is quite simple, and you have to do it only once to use the DJI FPV Remote Controller 2
Afterward, you can select a map and enjoy this great simulator.
» RELATED: DJI FPV Remote Controller 2 with Uncrashed FPV Drone Simulator
DJI FPV Remote Controller 2 with DRL Simulator
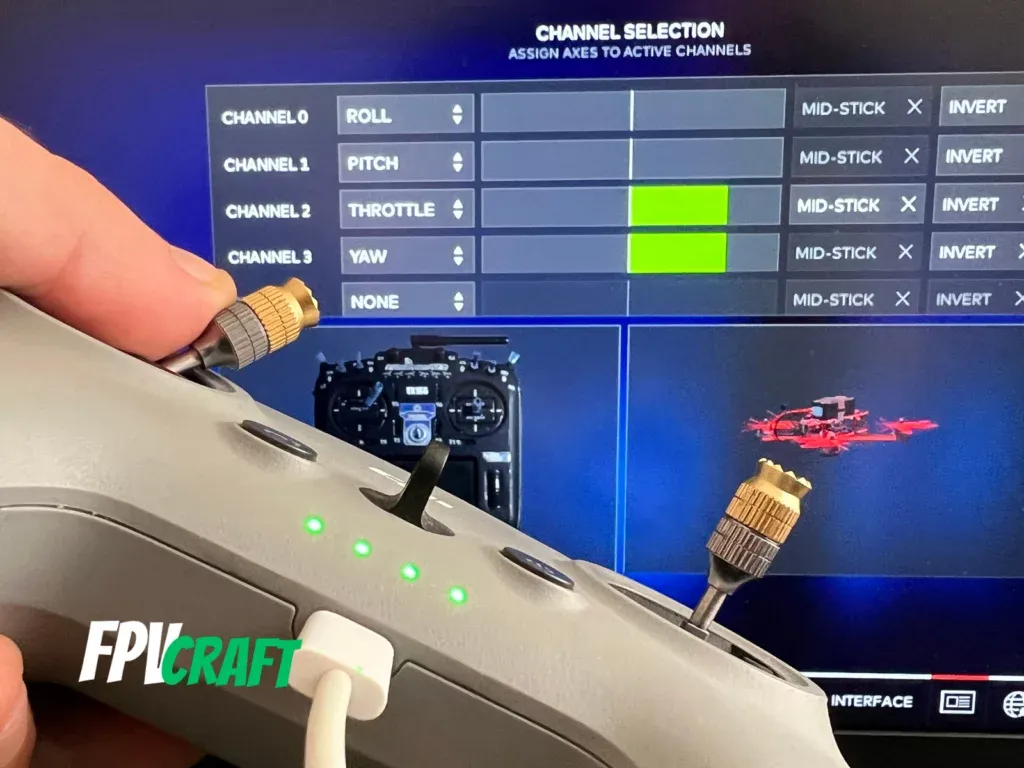
If you are into racing and you love some challenges, then this simulator is surely for you.
But who thought the DJI FPV Remote Controller 2 had full compatibility with DRL?
It does require an initial setup, but other than that, it works perfectly fine.
How do you set up the DJI FPV Remote Controller 2 with DRL?
- As always, connect the controller to the Windows PC or Mac and turn it on.
- Start the DRL simulator.
- At the bottom of the screen, you have the joystick icon in the main menu. Click on it.
- Choose “Manual Calibration“
- Follow the on-screen guide; a few channels may fail to bind (axes not assigned to custom commands), but you can skip those.
- For my DJI FPV Remote Controller, the throttle should have been assigned to channel 2, yaw to channel 3, pitch to channel 1, and roll to channel 0. The drone shown within the calibration menu may not show any response, though. That’s okay.
- Go Back and select “Channel Selection“. See if each axis is set correctly and responds well to its own channel. If not, try to assign the throttle, yaw, pitch, and roll to individual channels; the drone should respond well in this scenario.
It may seem like a complex way, but it should not take more than 5 minutes to make it work.
Afterward, you can train in the Drone Racing League with the DJI FPV Remote Controller 2 without any issues.
» RELATED: Can you use DJI FPV Remote Controller 2 with DRL Simulator?
DJI FPV Remote Controller 2 with VelociDrone
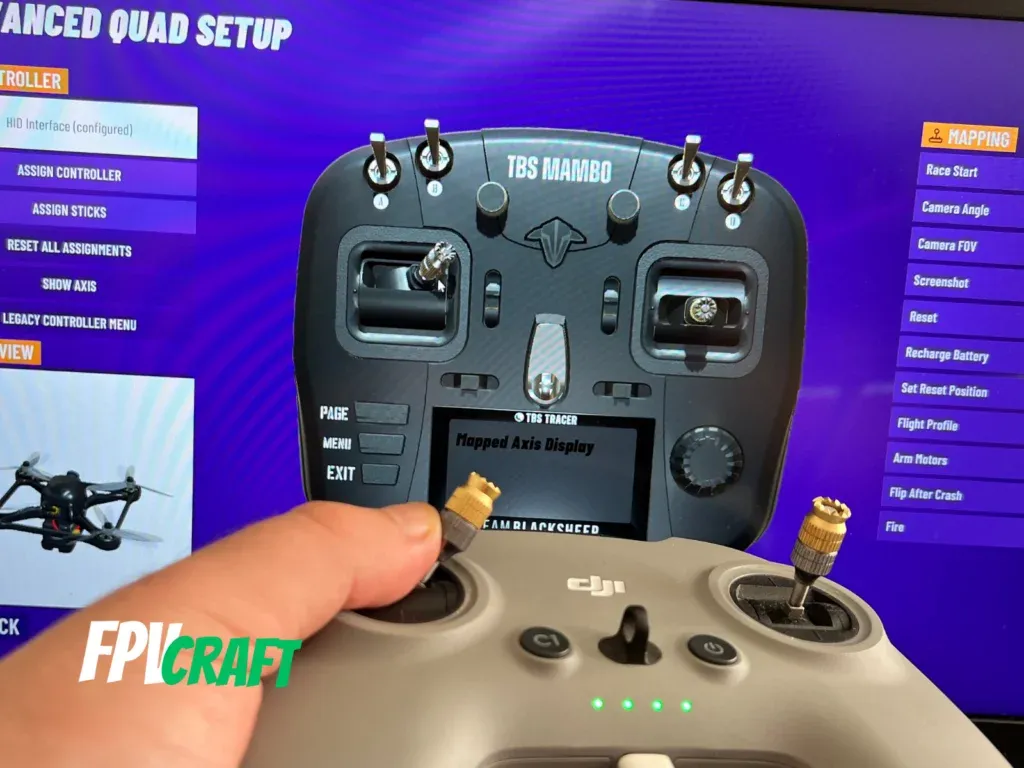
VelociDrone is one of the most advanced FPV simulators with the best physics, drone dynamics, throttle management, and response as compared to any existing simulators.
And yes, this controller works flawlessly with VelociDrone. As with other simulators, to use the controller in VelociDrone, you also have to do a one-time setup.
To use the DJI FPV Remote Controller 2 with VelociDrone, follow these steps:
- Connect the DJI FPV Remote Controller 2 to the Windows PC or Mac and turn it on.
- Start the VelociDrone as normal.
- In the main menu, go down to Controller.
- Press the “assign controller” and move a stick.
- Click on “Assign Sticks” and follow the on-display guide.
- You will be requested to move the roll, pitch, yaw, and throttle axes with no guide overshowing which are those. See the below image (as also shared above) to understand each axis channel in case you struggle to remember it.
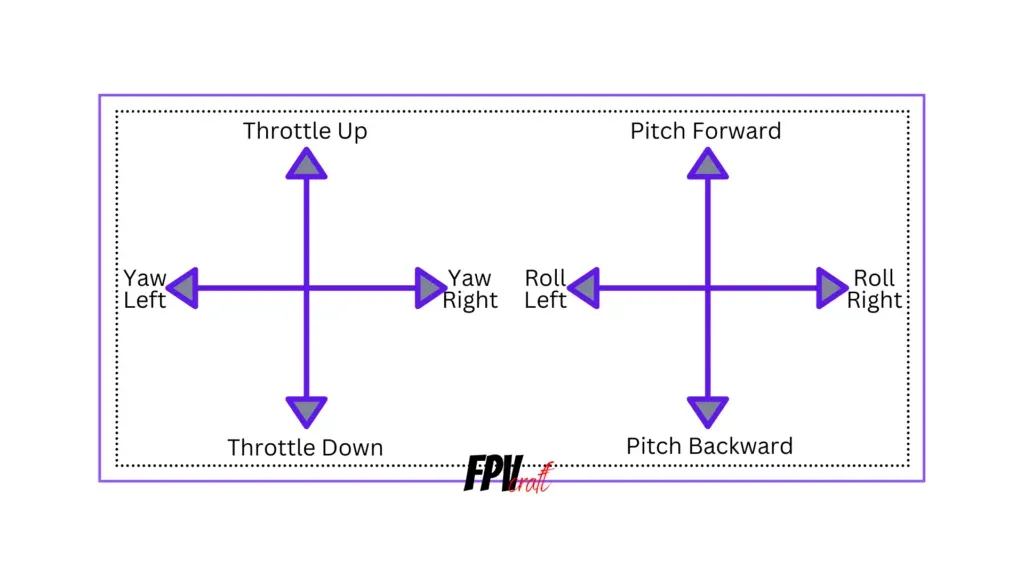
Now, you can start any map and freely use the DJI FPV Remote Controller 2 with VelociDrone.
» RELATED: VelociDrone with DJI FPV Remote Controller 2
DJI FPV Remote Controller 2 with FPV SkyDive
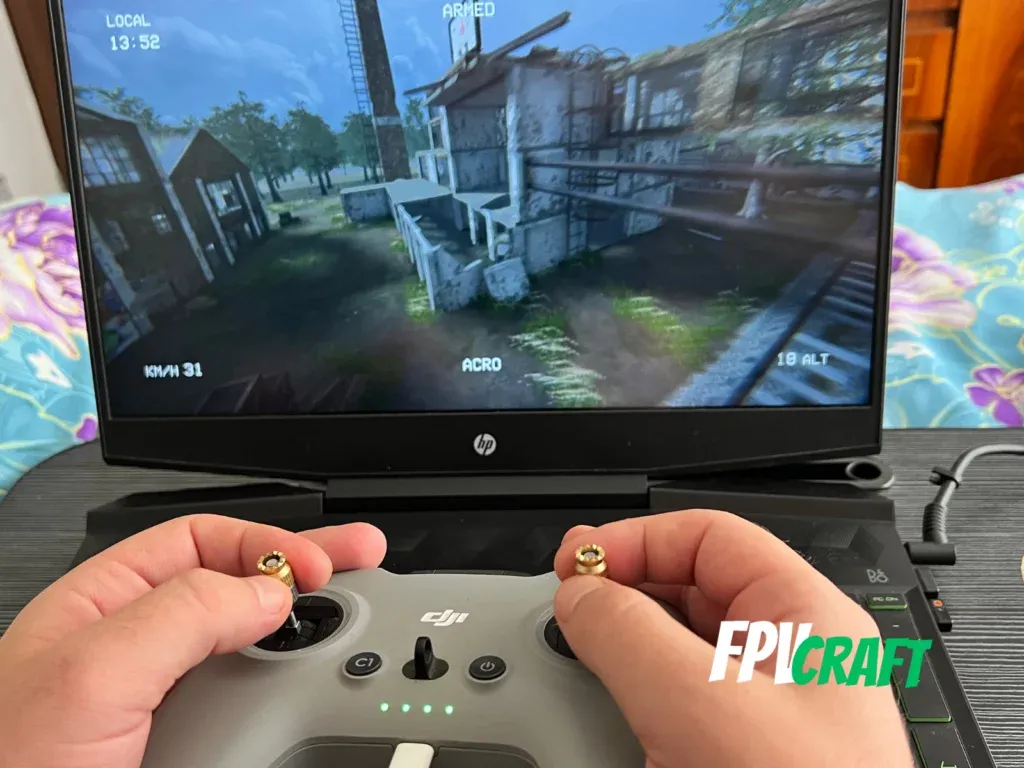
FPV SkyDive is one of the top free simulators you can find.
Although FPV SkyDive may not be the best in terms of simulator physics, throttle management, drone mechanics, graphics, and content, we cannot really complain about free stuff.
As with any simulator, the FPV SkyDive had to have compatibility with FPV radio transmitters for training. And here comes into play the DJI FPV Remote Controller 2.
This controller is indeed compatible with FPV SkyDive from Orqa FPV.
To configure the DJI FPV Remote Controller with FPV SkyDive, do as follows:
- Connect the DJI FPV Remote Controller 2 to either Windows PC or Mac and power it on
- Start the FPV SkyDive Simulator
- Settings > Controls > Controller Calibration and click Configure
- Follow the on-screen tutorial, and at the end, when asked, select FPV Radio from the two options
No other settings need to change to enjoy this free-to-play simulator and train in it.
» RELATED: Is FPV SkyDive Free to Play?
DJI FPV Remote Controller 2 with FPV FreeRider Recharged
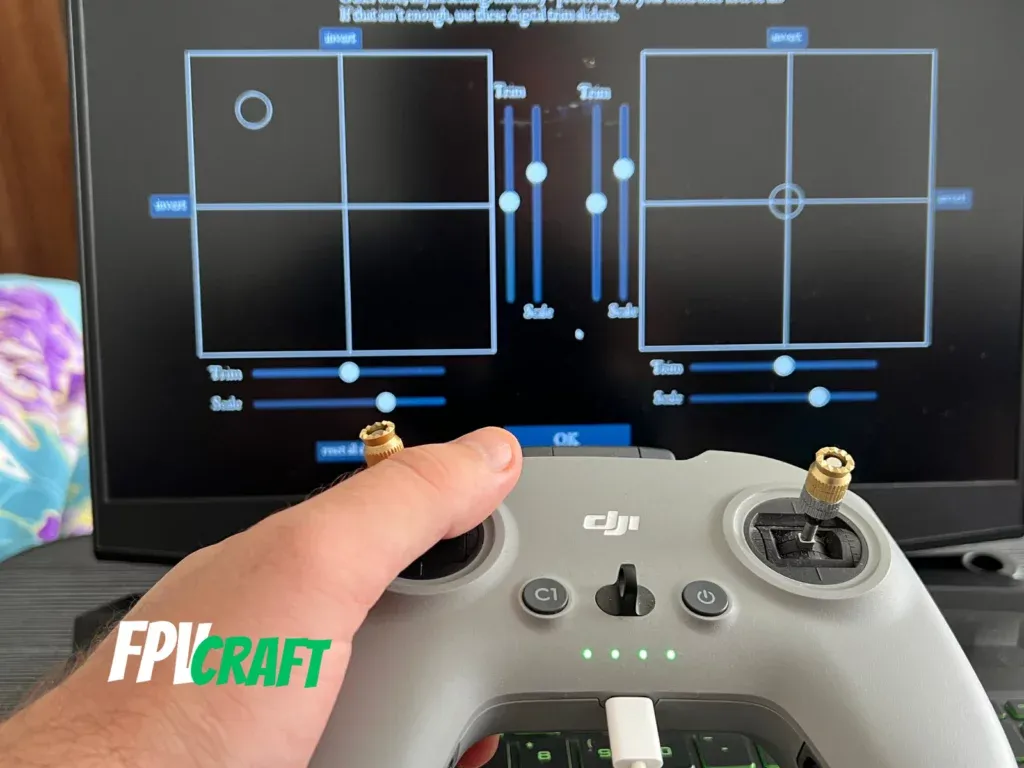
FPV FreeRider (Recharged) is yet another FPV simulator I own and had a bit of training in it, but not so much because, frankly, it cannot be compared to any other top FPV simulators.
However, there is a target audience for this simulator, and although the maps are extremely small and the drone will fly havoc, with the right sim configuration and physics adjustments, you can also enjoy training in FPV FreeRider, the “Recharged” version.
But what about using the DJI FPV Remote Controller 2?
As mentioned in the summary, this controller is fully compatible. However, you may need to perform basic controller configurations, including calibration, to make it work.
- Connect your DJI FPV Remote Controller 2 to your computer
- Start the FPV FreeRider Recharged
- Into the main menu, on the right side, you have a few controller options.
- Ensure Input is set to the USB Controller.
- Click “Calibrate Controller” and follow the on-screen guide.
- Have active the “Throttle zero at bottom” in the main menu
- Set the “Dead zone is off” in the main menu.
Tips to use DJI FPV Remote Controller 2 with FPV Simulators
If you already have the DJI FPV Remote Controller 2, that’s super great. And even if you plan to acquire it, still, there are a few tips I want to share with you to make your life easier.
Pinch vs Thumbs
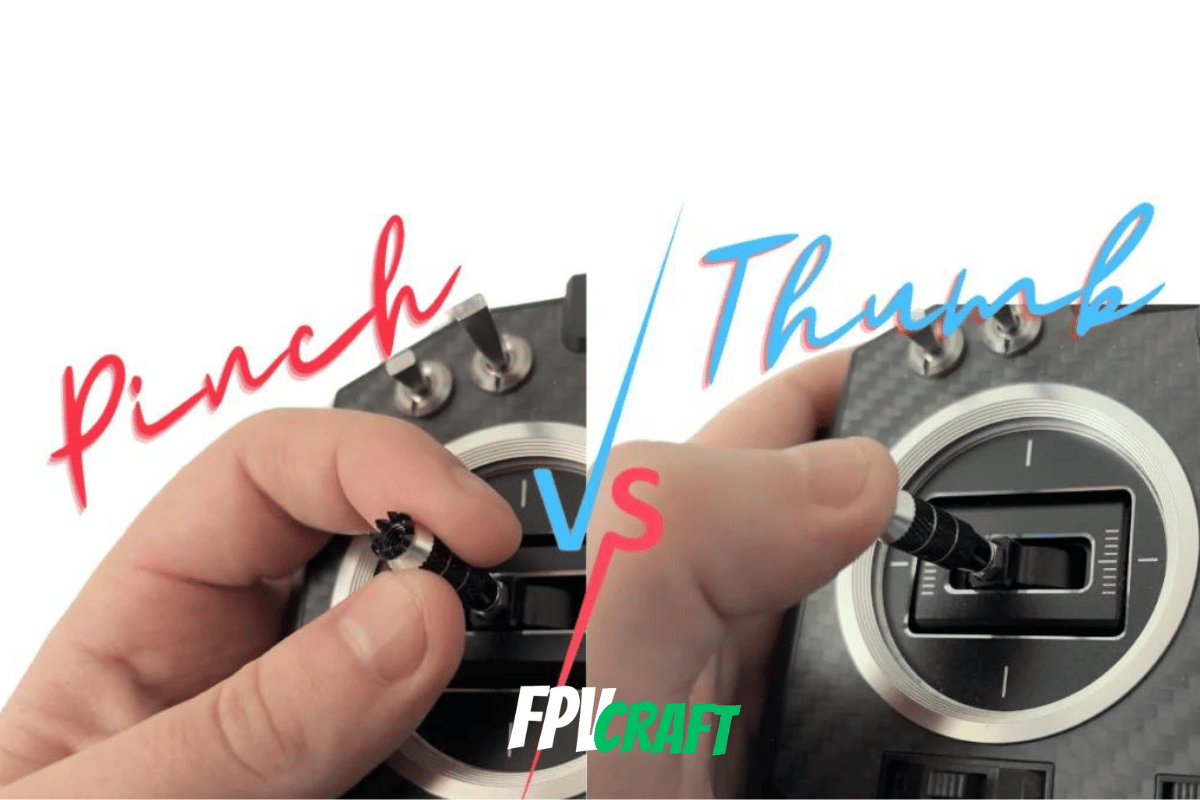
It is good to decide early on when you get into FPV, and you plan to use this remote controller to fly your FPV drone to build your muscle memory of flying based on either pinch or thumb stick control.
This way, you will have a most comfortable way of flying your drone as per your style and keep practicing that way.
With thumbs is the classic way to fly a normal drone. It’s good to use thumbs with short sticks (usually the stock ones), and this method may work great if you’re looking for quick and swift freestyling.
The disadvantage of controlling your FPV drone’s radio with thumbs is that this finger doesn’t have the same quick reactions as your index and other fingers, and you’ll have to work with that.
With a pinch, you will literally have to “pinch” the remote controller stitch with your thumbs and index finger. With this method, you can have much more accurate flights with your FPV drone, but it will be harder to master.
The disadvantage is that you’ll probably have to acquire some longer sticks for your DJI FPV Remote Controller 2 to take advantage the most of this method.
The hybrid mode is a way to use your FPV remote controller sticks with your thumb on the sticks, the same as using thumbs, but your index finger will also be placed on the controller sticks.
It’s an excellent method many FPV drone pilots use, but it is just a mixture of the two.
If you’re looking for more information about this, I recommend checking the following article.
» RELATED: Pinch or Thumbs When Flying FPV Drones?
You can bind additional DJI FPV Remote Controller 2 buttons to FPV simulators.
Moving away from the four elementary axes to fly the drone (throttle, yaw, pitch, and roll), the DJI FPV Remote Controller 2 is also capable of channeling yet other buttons as axes.
But I always struggled with this to make many other buttons functional.
Depending on the simulator, this may work, partially work, or won’t work at all.
However, the core button from the DJI FPV Remote Controller 2 I managed to channel in most FPV simulators is, in fact, the cogwheel for the DJI FPV or Avata camera angle.
If I can’t manage in a specific simulator to bind to other axes different buttons, that’ll be the one to always work to put a function, and usually, I set to reset the drone in the simulators to the cogwheel.
It may seem a bit unpractical use, but it works just fine.
Don’t cover the DJI FPV Remote Controller 2 radiator when training.
On the back of the remote controller, we have a sliced hole with an exposed radiator, where the remote controller will cool down.
We may unintentionally cover the radiator when we sit comfortably in bed with the DJI FPV Remote Controller 2 in our arms or lap to train in simulators.
This can lead to the controller to heat up more than it should.
I excessively used the DJI FPV Remote Controller 2 to train in FPV simulators, and although I felt sometimes it got uncomfortably hot because the venting was covered, it never damaged the controller.
And the controller does not have any kind of active cooling.
It’s just a thing you should remember.
» RELATED: How to Learn Manual Mode on DJI FPV and Avata

