How to Learn Manual Mode on DJI FPV and Avata
In this article, I want to help you with a step-by-step guide on how to learn to fly the DJI FPV and Avata drones in Manual Mode.
Flying the DJI FPV or Avata seems like an excellent deal for an FPV beginner; after all, this is the main reason DJI created those two FPV drones, isn’t it?
But manual mode equals a drone flying similar to acro mode.
And to fly a drone in acro mode as an FPV beginner may seem complicated, if not impossible.
So, how do you learn manual mode on DJI FPV and Avata?
To fly such drones in manual mode, you must undergo basic training in an FPV simulator, such as DJI Virtual Flight or another. It will take 2 to 10 hours of activity in the simulator to understand how an FPV drone flies in acro or manual mode, with more hours behind a sim for negligible risk of crashing your DJI FPV or Avata drone.
But there’s more to it. That’s why we strongly recommend staying with us until the end of the article to have a concept of how you can fly the DJI FPV or Avata drones in manual mode.
What is the manual mode on DJI FPV and Avata?
You won’t find the manual mode in any other DJI drone: it’s a way to fly the drone acrobatically, just like a custom FPV drone.
These drones will fly differently from a standard drone, and it’s considered high-risk flights.
Your drone won’t hover and turn left or right nicely while maintaining altitude.
You will have to direct your drone towards one direction, which is flying as such and only forward like an airplane. You can learn how to hover, but that’s another story.
To control the DJI FPV or Avata in manual mode is not an easy task. You will have to undertake some basic hours in a simulator for you to understand how this works. It’s as simple as that. Don’t skip it, or you may crash your brand-new drone if you fly in manual mode.
Second, to fly in manual mode DJI FPV or Avata, you must remove the throttle spring tension from the DJI FPV Remote Controller 2.
An FPV drone controller, compared to a standard one, the throttle joystick always has no tension and never returns to the middle.
This way, you control the speed and altitude of the drone in combination with movements of the yaw, roll, and pitch axis to change direction speed and do acrobatic tricks as you like.
In time, all these skills will be muscle memory, the same as with driving a car or riding a bike.
But for now, you must remember that if you are new to FPV, manual mode, or acro mode, you do not fly at all the same as a standard drone in normal or sports modes.
It’s an entirely new field to explore and a hobby based on that.
» RELATED: Is the DJI FPV Remote Controller 2 any Good? (Review & Guide)
What’s the difference between manual mode and acro mode?
You’ve seen me often mentioning the acro mode. What is it? What’s the difference between this and the manual mode?
There’s not much difference, only that DJI has adapted this term instead of Acro mode. But there’s a little difference, and here’s why.
In acro mode, a drone has no active leveling system, gyroscope, or compass directing the drone. Everything is pure manual control.
But in the manual mode, some settings may stop the drone from becoming a full-acro one. Therefore, if these settings are active, the drone doesn’t fly in acro, but we can say it still flies in manual mode.
What we talk about is the “M Mode Attitude Limit” (not altitude, attitude).
This will level the drone automatically and won’t allow you to roll over or flip, more like an “angle mode” for an FPV drone.
But once we disable that from the settings, indeed, the DJI FPV and DJI Avata will fly like an acro drone.
» RELATED: Manual Mode vs. Acro Mode on FPV drones
How to disable “M Mode Attitude Limit” from DJI FPV and Avata
- In the Goggles, go to Settings > Control
- Go to Remote Controller > Gain & Expo
- Disable the “M Mode Attitude Limit”
It’s as simple as that.
But if you want to switch to manual mode for the first time, your DJI FPV or Avata, there’s one more thing for you to do: to activate the “M Mode” as a custom button.
- In the Goggles, go to Settings > Control > Remote Controller > Button Customization > Custom Mode
- Select from Sport Mode to Manual Mode
Can you fly DJI FPV or Avata without training?
If you want to fly in normal or sport mode, your DJI FPV or Avata can fly without any training, like a standard drone.
But if you want to fly in manual, hence acro mode, then definitely no.
Nobody is ever able to fly acro without basic training in any FPV simulator.
It’s an entirely new skill you will have to adapt to. It’s the same as nobody is ever to play a guitar nicely if they don’t practice beforehand.
That’s why following the next points in training a bit in FPV simulators is essential.
What is the best simulator to train flying DJI FPV or Avata drones?
Let’s start with something DJI offers for free: The DJI Virtual Flight.
This is yet the only simulator you can use with your DJI Goggles, which you got with your DJI FPV or Avata drone.
But there’s a catch.
The simulator runs on mobile only, and you will need to have your goggles paired with the remote controller and your drone to use it.
Moreover, although this is a free simulator offered by DJI, as a person who’s been training hundreds of hours in most FPV simulators, I can say that DJI Virtual Flight is poorly optimized and far below other simulators.
The throttle management, game physics, and drone mechanics are poor.
On top of that, since the iOS update 16.4 on Apple devices (iPhone + iPad), the goggles cannot be used anymore with the simulators without seeing heavy artifacts rendering the goggles unusable. This will affect most iPhones.
You may want to check the following article for more information.
» RELATED: DJI Virtual Flight Poor Image Quality in Goggles
That’s why, myself like many other FPV drone pilots, we have chosen Liftoff as an FPV drone simulator to learn to fly our FPV drones for the first time, whether a custom FPV, DJI FPV, or simply the Avata.
The Liftoff will work seamlessly with DJI FPV Remote Controller 2.
But we must mention that the Liftoff is a paid FPV simulator and is not free, although it is a one-time fee and not that expensive (we are not affiliated with Liftoff).
How do you learn acro mode in FPV simulators?
Now, let’s simply choose Liftoff for this guide on how to learn to fly acro or manual mode.
We could also choose the TRYP FPV, VelociDrone, Uncrashed, or DRL if you like, but Liftoff is well-known for simplicity and a great sim to start flying.
» RELATED: 5 Best FPV Drone Simulators
Before starting, pick up your DJI FPV Remote Controller 2 and ensure you have removed the throttle spring tension. This is mandatory when flying any FPV drones, especially in manual or acro mode.
You can find this information on the user manual of your DJI FPV or Avata kit, or you can follow the next video to help you do that.
You can skip this step if you already removed the throttle spring tension.
Basic Liftoff Setup
The first thing would be installing Liftoff (unless you choose other simulators). Connect your DJI FPV remote controller 2 to your computer, power it on, and start the simulator.
Before going further, you will have to calibrate your controller.
Go to Option > Control > Controller > Calibrate > Start Calibration.
Now follow the on-screen tutorial on how to calibrate your DJI FPV or Avata controller.
If you’re looking for more explanatory and in-depth settings to optimize your Liftoff Simulator, I recommend you check this article:
» RELATED: Best Settings for Liftoff Simulator
If you have issues recognizing your DJI FPV Remote Controller 2 with the Mac, you’re not alone. There’s a quick fix, and I have it covered in the following article
» RELATED: How to Connect DJI FPV Remote Controller 2 to Mac.
If you still have issues, try updating the remote controller. However, most of the time, you should not encounter difficulties.
Starting a simulator map
Moving forward, you can ensure you adjust the settings in Liftoff for the best experience and quickly understand it before entering the flight.
Now go to Single Player > Free Flight > Choose a Map > No Track > Choose a Drone and start the simulator.
I consider the “Straw Bale” map to be the most friendly to start practicing.
If you are in the simulator and see your drone sitting on the ground, test your remote controller to see if it’s responding well. If you push the throttle up and your drone responds in the simulator, it’s all good.
But if it doesn’t respond at all, there may be a connection issue often found in Mac computers. Follow the above article for more info.
Learning to fly Acro Mode in a simulator
Now, with your arrows from the keyboard, push down until you see “Camera Angle 20 Degrees”. 30, the standard with Liftoff, is too much for a beginner.
It’s a personal preference, after all. I have an article for you to read after you have learned the basics of how to fly an FPV drone in simulators:
» RELATED: Best Rates for Liftoff Simulator
Now you will have to spend a few hours in this simulator, at least, to learn to fly acro. But how?
There are a few of the best practices I can recommend when learning for the first time to fly an FPV drone in a simulator.
First, if you have a mode 2 remote controller (like 99% of us do), you should have throttle and yaw on the left gimbal and pitch with roll on the right gimbal.
The next image would be important to remember as each of the stick’s inputs will have a different response to the drone.
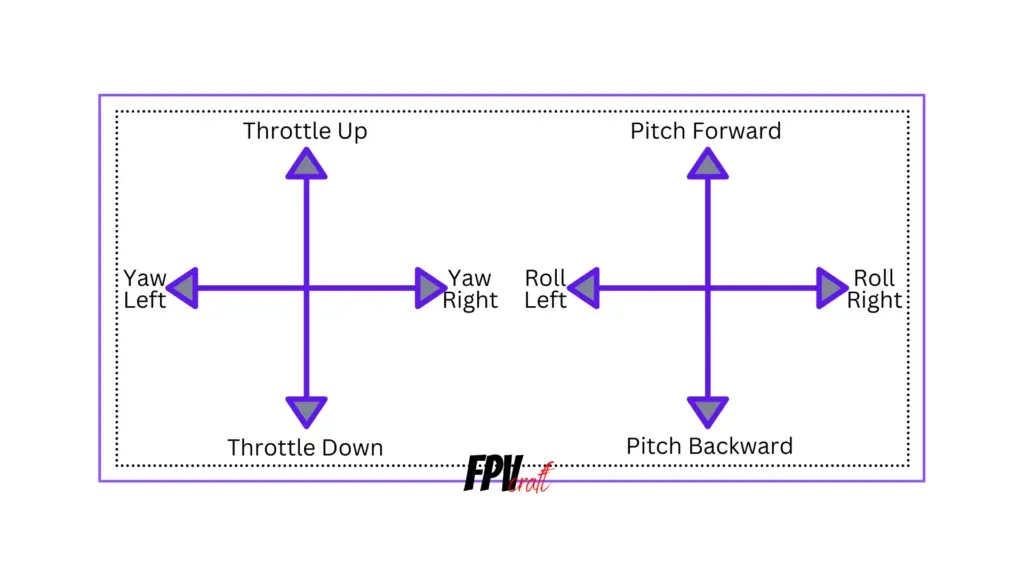
And to fly an FPV drone in acro/manual mode, you will need a combination of joystick movements; ultimately, this will be muscle memory, but yet until then, you have to learn the moves.
Learning throttle management
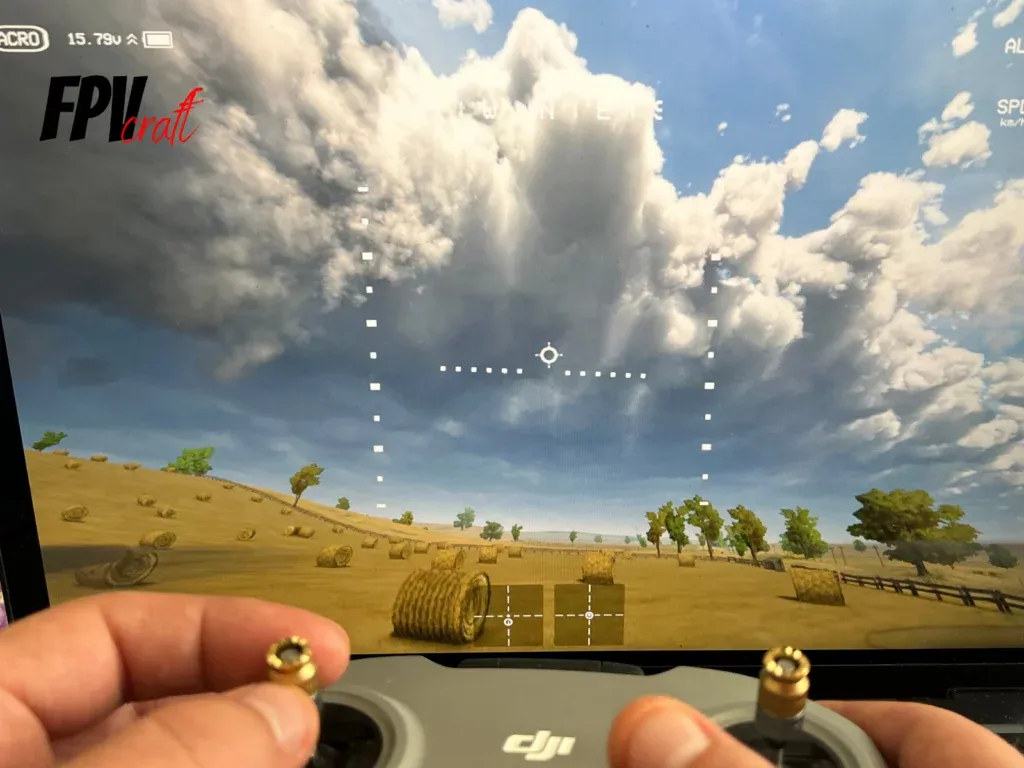
The throttle management would be the first thing you should learn in a simulator.
Basically, it is how the throttle responds to the stick input.
In some simulators, the drone will start lifting off at half-throttle input. Many other simulators are below or even above the half-point.
Each drone you choose in the sim may have a different takeoff point depending on the motor power, battery, and the drone weight.
The same principle applies to real-world FPV drones.
The first part of this lesson would be slowly pushing the controller throttle up slightly to the point it lifts off the ground.
Don’t touch any other joystick inputs yet. Just the throttle.
Practice throttling up and down until you have an idea of how the drone responds to throttle input in the simulator.
Then, keep practicing until you stabilize the drone slightly at a specific altitude.
To understand the throttle won’t take long. This practice should be 5-10 minutes. If the drone start going sideways, press “R” on the keyboard to reset it. You need to comprehend exactly how the throttle works.
But this won’t be enough to fly a drone. You need to move forward or even backward.
For this part, you will need to combine the throttle with the pitch.
Throttle + Pitch (move forward)
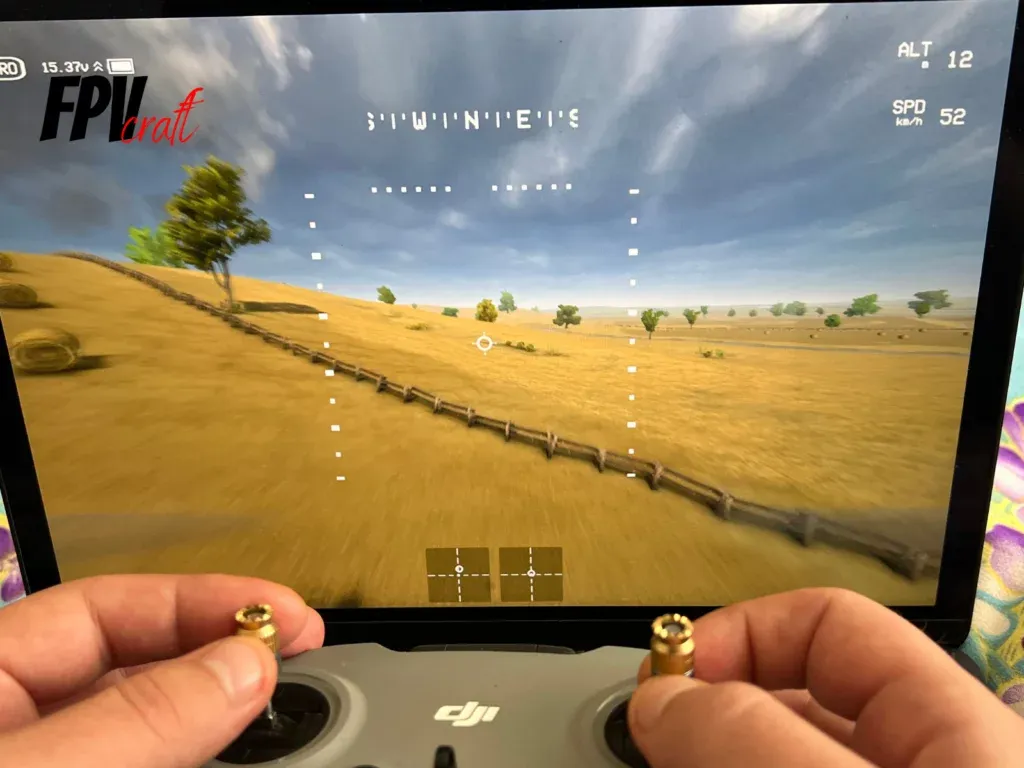
Note: Remember that you will need very little push of the pitch for the drone to move forward. In fact, from the center point to the maximum pitch up, it’s about 5%, maybe, which looks insignificantly low.
When you pitch up, the drone will incline forward. When you pitch down, it will lean backward.
Depending on your camera angle, you should fly forward at a constant speed if you get the horizon line in the middle of the screen.
Now, without going for the yaw and roll axis, try to throttle up the drone and pitch forward to fly forward.
When the drone is flying forward, you will have to input more throttle, or the drone will descend.
The higher the camera angle is set, the more throttle input you have to put in, and the drone will fly at a higher speed.
If you push too much pitch, the drone will face the ground and crash.
That’s why pulling down the pitch should stabilize it.
In fact, after a second or two of pushing the “pitch,” the drone should keep going forward if you release the pitch (goes back to the center point).
But if you need readjustments, pitch down or up and repeat the process.
Keep practicing with the pitch up and down while the drone is throttled up and flying in the simulator.
Don’t worry about this simulator practice if you crash in the first obstacle or go beyond map boundaries. Just keep resetting the drone and try again.
You will need to have a grasp on how to maintain an altitude and constant speed.
This should take like 30 minutes to one hour of practice, the same thing over and over.
I know it may be tedious and very repetitive, but it’s the best way to learn input without confusing too much at once.
YAW + Roll (change directions)
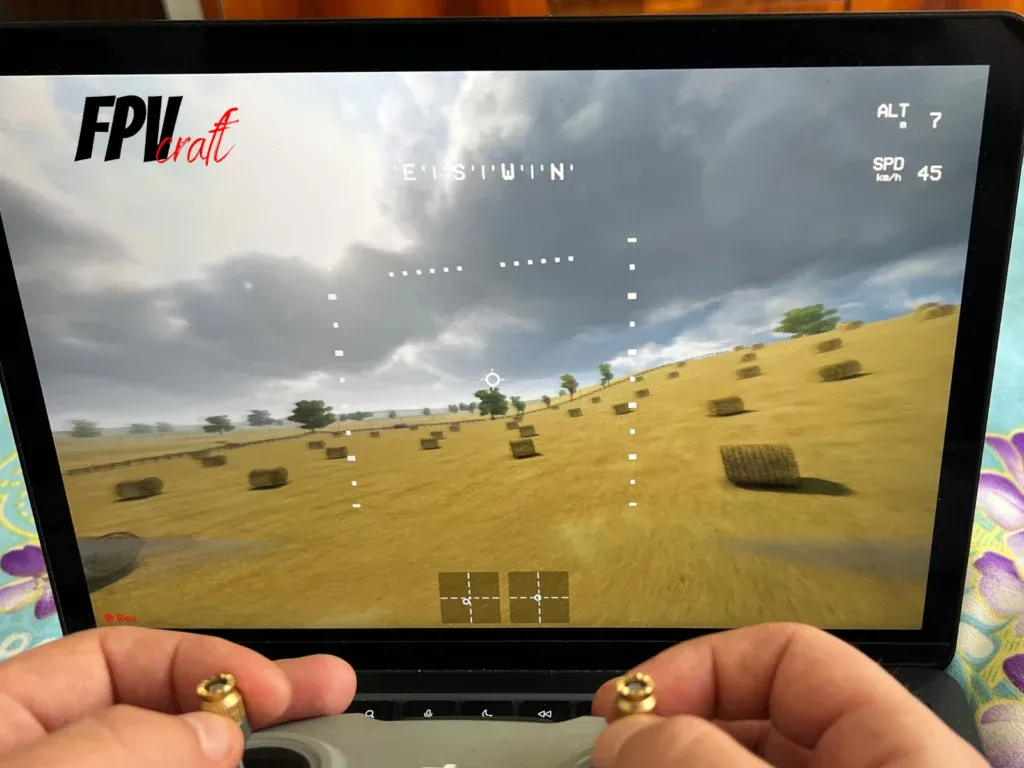
Note: When taking turns, your joysticks will need to travel just a little to the left or right, very little, to take turns with your drone (about 5-10% from the center point of the axis to the edge)
Now, if you managed on the above points to maintain an altitude and fly forward to a constant speed, it’s time to learn how to take turns.
This may be slightly complicated for a beginner and can take a couple of hours until you learn the process.
But once you know all of the above three points, congratulations, I can say you know the introductory flight of an FPV drone.
Now, how do you do that?
If you want to take turns, for instance, to the left, you will have to slightly turn your YAW and, at the same time, the ROLL to the left.
Depending on the camera angle, usually, YAW will go further from the center axis than the ROLL. You have to slowly do it and build it up from there.
In the beginning, the horizon line will tilt a lot as you learn to take turns.
You need to try your best to get it straight in the middle of the screen. It takes some time.
Don’t forget that at the same time; you will have to apply what you have learned on points 1 and 2 to maintain an altitude when going with your drone forward and then taking turns.
Time to practice
Now, from what you have learned above, it’s time to keep practicing and repeating the process.
You will quickly learn to fly an FPV drone once you understand how things work.
Don’t just fly yet your DJI FPV or Avata outdoors in manual mode.
Back to the simulator, when combining the throttle with pitch and then yaw and roll to take turns, readjust the throttle, and lower the pitch to slow down your drone flight. Take turns accordingly.
Keep combining systematically these four axes to learn and practice flying an FPV drone in the simulator.
The next step would be to try dives. We won’t do freestyle now, but with dives, you learn how to recover a drone close to the ground.
Diving FPV drones
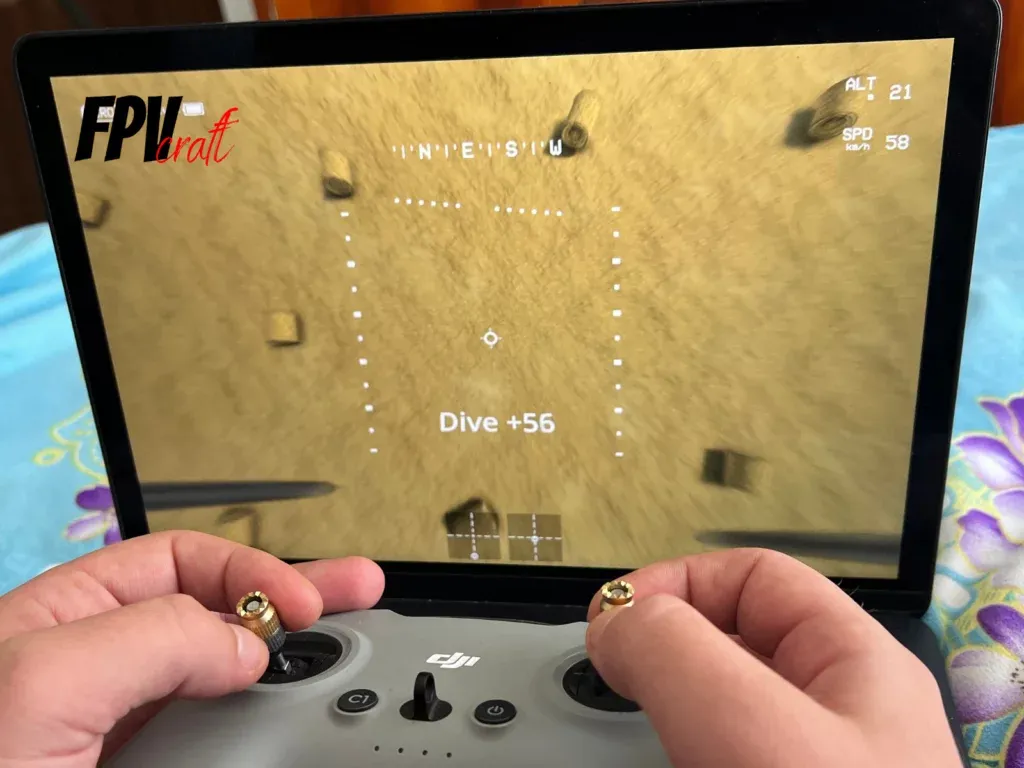
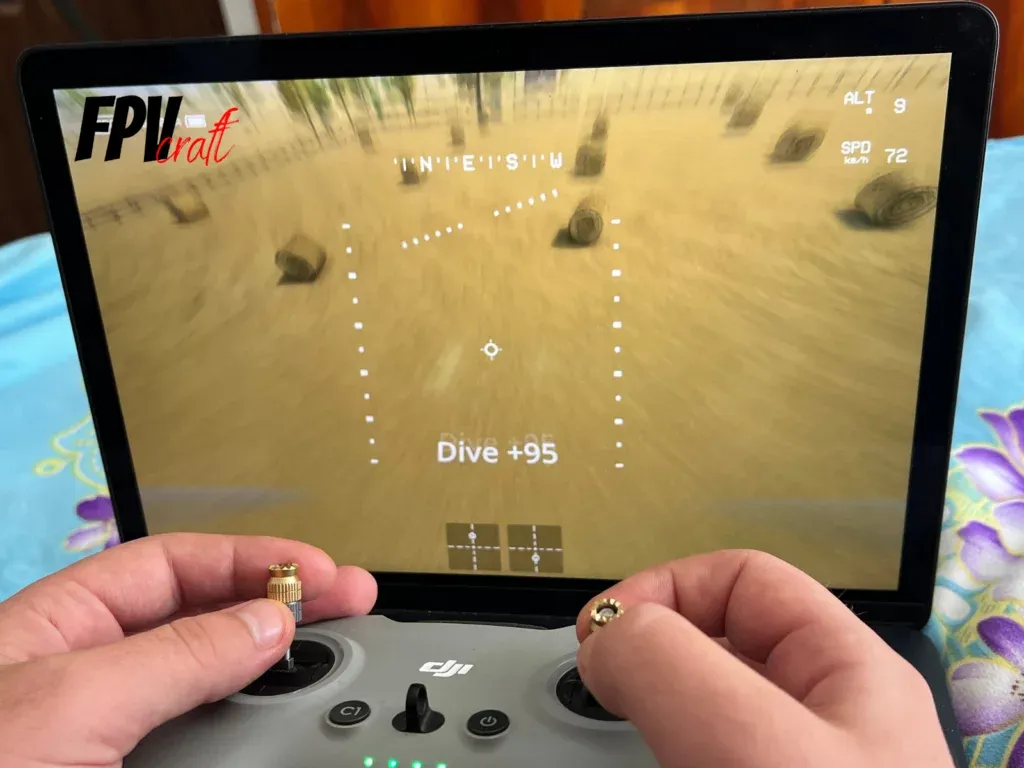
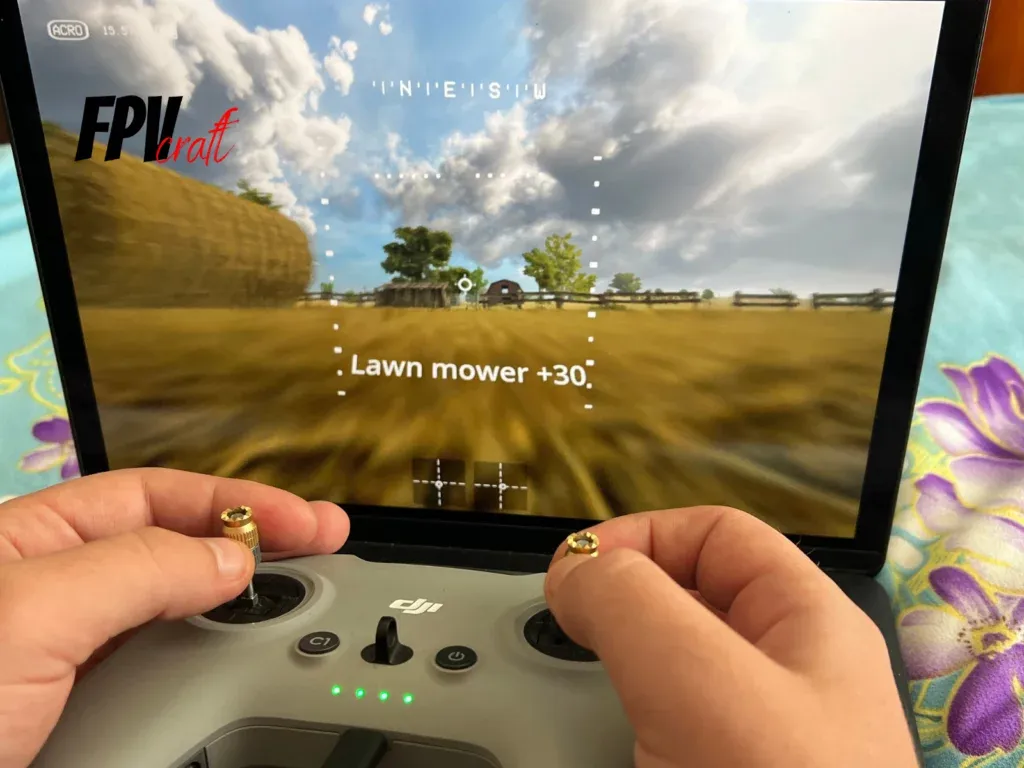
Diving in FPV
To do a dive, you will have to throttle up your drone a lot and get to a higher altitude.
When you want to do the dive, release the throttle entirely (get the throttle axis entirely down) and slowly push up the pitch until you see the ground below.
Pull down the pitch and throttle up a lot to recover when getting close to the ground.
Learning how to stabilize a drone when diving will take about 20 to 50 tries.
Remember, we’re still in the simulator and don’t do such tricks with a real drone yet.
Also, I won’t recommend diving with the DJI Avata as this drone has a high risk of tumbling and can lose control.
Recap
From what we’ve learned here, controlling an FPV drone is just very basic and will take you some time to do it.
It’s best to take it by order, or you will have more difficulties learning.
- So, first thing, learn to throttle and maintain the altitude of the drone in the simulator.
- The next thing is to learn to go forward at a specific speed (with the horizon line in the middle of the screen) while maintaining altitude.
- Then, learn how to slowly turn the drone and build your way up while your drone is flying forward. YAW + ROLL left will turn the drone left. YAW + ROLL, right, will turn the drone right.
- Ultimately, it’s good practice to learn how to dive as this will help you learn to stabilize a drone when getting it close to the ground and avoid unwanted crashes.
» RELATED: How to Get Smooth and Cinematic FPV Drone Footage (Guide)
How many hours of training do you need to fly in manual mode?
Although we recommend spending between 2 and 10 hours to understand the basics of how an FPV drone flies, we recommend training for much more.
It’s better to be safe and sharp in your flying skills than crash the drone for the first time.
Although these are just the basics we learn during this time, the training will perfect your ability to fly an FPV drone from muscle memory.
Furthermore, if you ever want to learn how to do acrobatic tricks (freestyle) or even race, then you need a lot more hours to know every move and perfect it as much as possible.
For freestyle, I will recommend spending about 50 to 80 hours in a simulator. Yes, that’s how long it took me to learn how to freestyle decently without crashing my drones every time.
If you want to learn how to race, then you may have to spend hundreds of hours in a simulator to get some racing skills.
But do you really want to race with your DJI FPV or Avata? Me, as one, surely not. I will choose a custom FPV drone. Even to freestyle.
Is it dangerous to fly DJI FPV or Avata in manual mode?
Yes, it’s hazardous as you will be in total control of the drone.
The drone won’t hover, it won’t know where and how to fly, and you control everything.
Your drone will also catch incredible speeds, especially the DJI FPV.
Without a sharp and accurate ability to control an FPV drone in acro mode, you can crash if you push your limits.
That’s why, all things considered, flying an FPV drone in acro mode (or manual) is hazardous, even for the more experienced pilots.
DJI Avata is a cinewhoop, meaning it has duct guards. This will protect the drone and others from minor impacts.
With this drone, as many mention, it may not be as dangerous to fly as with the DJI FPV, a.k.a. the nearly 1kg potato.
» RELATED: DJI Avata vs. DJI FPV (In-Depth Comparison)
Six tips to fly DJI FPV and Avata in manual mode
Fly in an open field: For first-time acro pilots, it’s best to fly your DJI FPV or Avata in an open area, far away from any obstacles, buildings, and people. You now need to comprehend what you have learned in a simulator with a real-world scenario.
Don’t try acrobatics as a beginner: Even if you have learned the basics in a simulator on how to do flips or rolls, doing it in the real world is extremely dangerous. You have to account for more than the skill, such as RATES to use, tunning your quad for freestyle, etc.
It’s a marathon, not a sprint: Although understanding acro may take a short time, flying professionally will take months and years of training and flying FPV quads. It’s all a marathon, and don’t rush your progress by taking unnecessary risks.
Have one finger on the Emergency Brake: Yes, the DJI FPV and Avata have something unique called an emergency brake. If you feel you have lost control of the drone, pressing that button will stop the drone in one place, return to normal mode, and hover. This feature can save your drone.
Take off for the first time in normal mode: Don’t go straight manual. Get used to your goggles and how the image is displayed, the motion from the goggles to ensure you don’t have any sickness, etc.
Check your surrounding airspace: Make sure someone is there with you from a legal standpoint (you need a spotter). If anything comes flying around, you won’t see the surrounding airspace but the spotter will. Always respect the drone laws.
» RELATED: Best Gain & Expo Rates for DJI FPV Drone

