Best Settings for Liftoff Simulator
Starting with an FPV simulator may not be an easy task. And this is why, we're talking about Liftoff today and the best settings for a seamless experience.
Liftoff Simulator is one of the most known FPV simulators that helped many become FPV drone pilots.
In order to fly an FPV drone in acro or manual mode, you have to undertake at least the basics of an FPV simulator to learn how to fly such a drone.
And Liftoff is known to be the first FPV simulator for many FPV drone pilots, including myself.
You simply cannot go wrong if you choose Liftoff to start your journey in FPV.
In this topic, I want to get into detail and help you correctly set up the Liftoff simulator and the best settings.
Recognizing and calibrating a controller in Liftoff
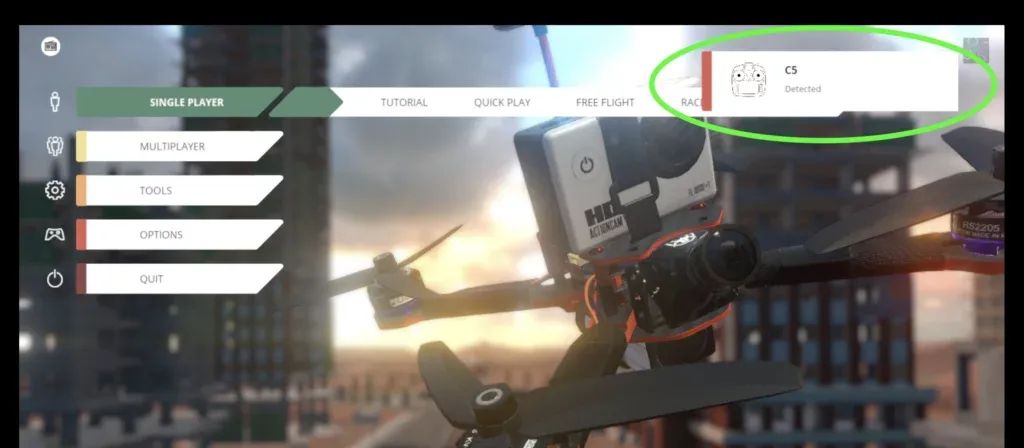
After you enter the game and connect your FPV Remote Controller while on the main menu, you should get a message that the device has been connected (see the above screenshot).
You must get the remote controller to be recognized in the simulator. Otherwise, you may have a problem recognizing it on your computer.
But connecting it won’t be enough. You will have to calibrate the remote controller for this to function properly.
How do you do it?
- Go to Options > Control > Controller.
- Go to Calibrate > Start Calibration.
- Follow the on-screen tutorial.
- Now save it
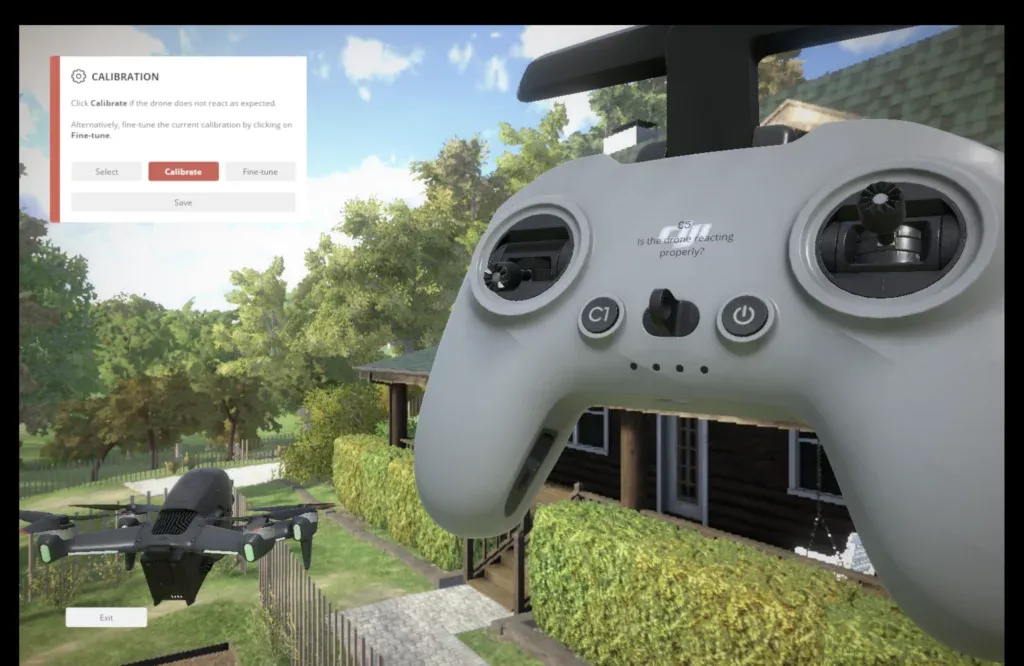
It is good to go once you calibrate the remote controller, and it responds well to any input, as with the drone example on the left.
This won’t need any recalibration to function. But if you have issues responding correctly, you can fine-tune it.
Now, if you have issues connecting your DJI FPV Remote Controller 2 to the computer or to use in Liftoff Simulator, there could be fixes for this.
The biggest issue could be when you try to connect your DJI FPV Remote Controller 2 to Mac via a USB-C to USB-C cable. This most likely won’t be recognized.
I also wrote an entire article to cover this topic:
» READ MORE: How to Connect DJI FPV Remote Controller 2 to Mac
Another issue could be related if the DJI FPV Remote Controller 2 firmware is outdated. Simply update it, and the problem will be fixed.
With other FPV RCs, I didn’t have any problems connecting.
But all of them have to follow the same calibration process.
» READ MORE: Can you use DJI FPV Remote Controller 2 with Liftoff Simulator?
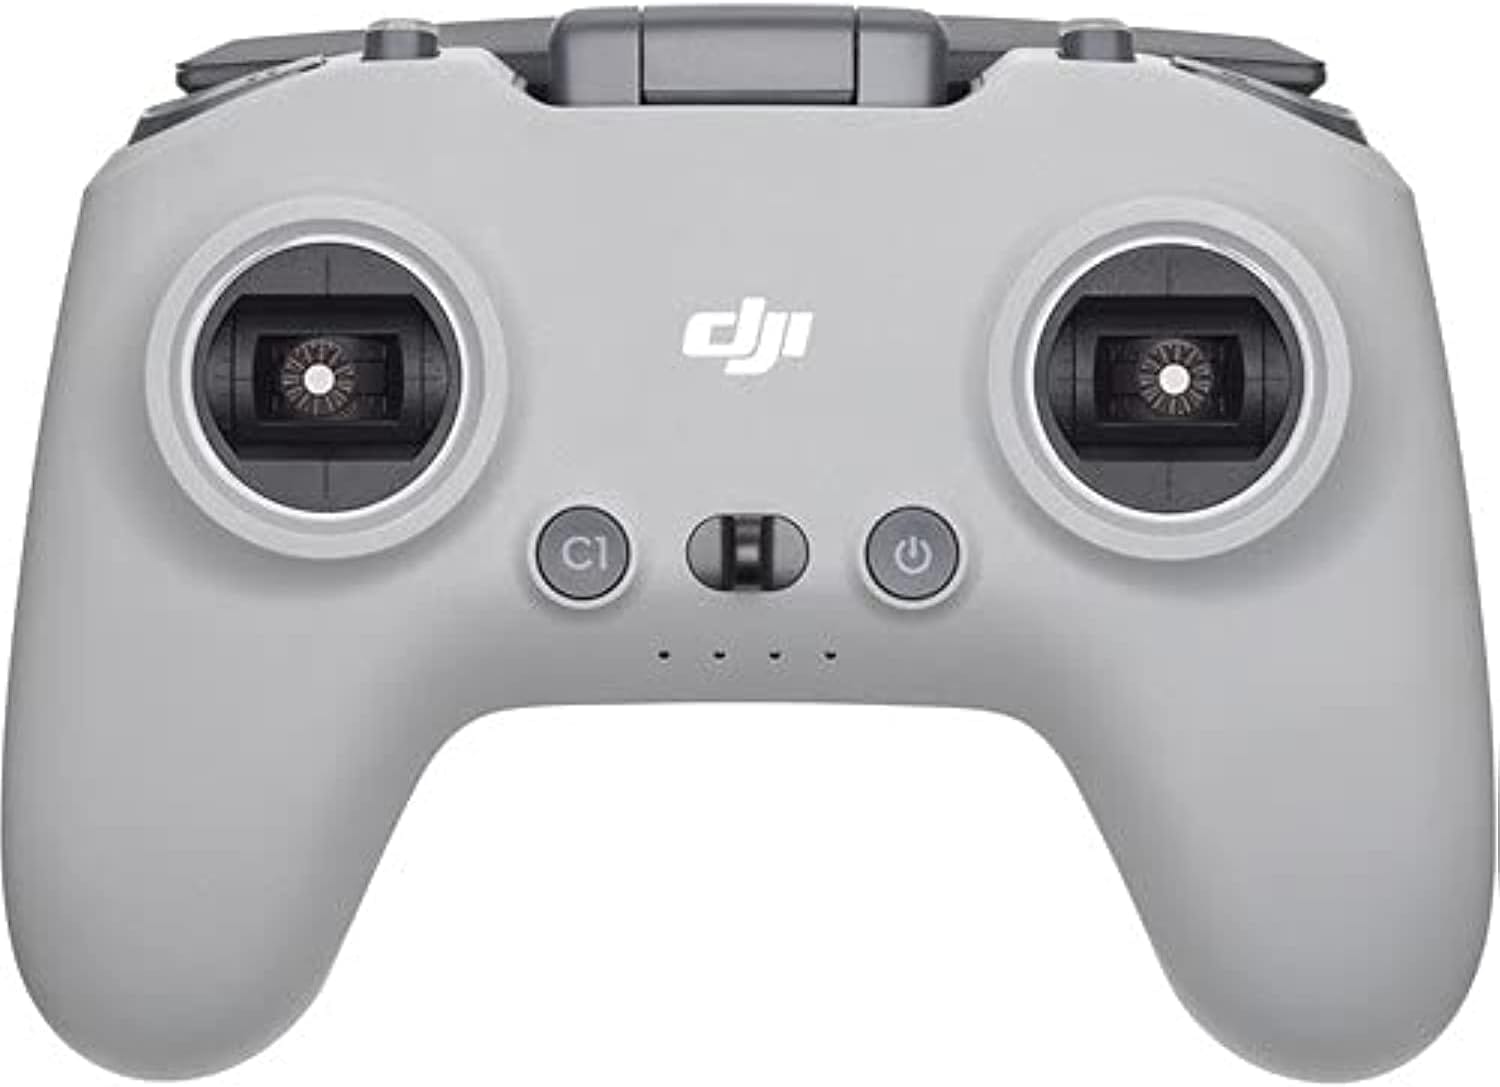
DJI FPV Remote Controller 2
The DJI FPV Remote Controller 2 is compatible with the DJI FPV drone, DJI Avata, and many FPV Simulators such as Liftoff, Velocidrone, DRL, etc.
This is an affiliate link. We earn a commission if you make a purchase, at no additional cost to you.
Best graphic settings for Liftoff
The graphic settings will determine how smoothly your simulator will work on your computer system, depending on the graphic resources, RAM, and CPU you have.
To change graphic settings, go to Options > Graphics
Now, if you don’t have a gaming computer, it is best to lower your graphics and resolution for smoother gameplay.
Remember, this is a simulator; you need the drone and image to respond perfectly without video lag.
For instance, with my MacBook Air M2, I had to decrease the graphics a bit for smooth gameplay.
But the most important part was to drop down the resolution. This will eat most of your graphic requirements.
1470×956 is the resolution I set for myself.
If the Liftoff simulator works well with this resolution, try increasing it to the borderline it won’t be smooth for slightly more details. But that’s not mandatory.
I like the V-Sync to be set on double buffering for FPS to be limited on your screen Hertz. For instance, my screen has 60Hz, so the framerate will be limited to 60FPS.
This will help with avoiding frame tearings. Moreover, I know that with V-Sync, my graphic card won’t be throttled to the maximum for unnecessary extra FPS.
Personally, I have set the graphic settings to “beautiful.” You can set it from “Fast” (lowest) to “Fantastic” (Highest).
If you have a problem with frame drops, decrease the video details towards the lower side. But remember, the resolution will have the most impact, so you will have to drop it down first.
You can activate all the other settings for extra details if your computer allows it. I disabled “fisheye” because it is a bit unpractical with today’s FPV cameras.
For the FPV lens size, I kept it at 118 degrees.
» READ MORE: Liftoff vs. TRYP FPV (Which One is Better?)
How to make Liftoff more realistic?
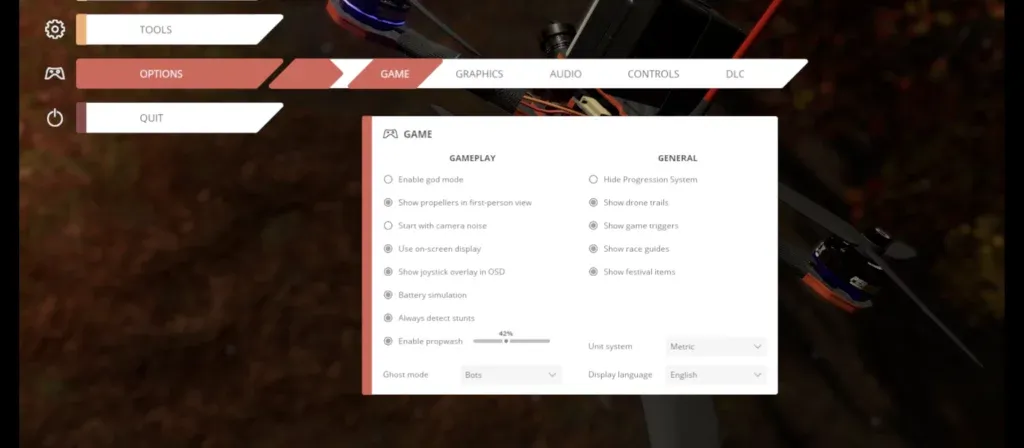
Now, you have to change a few more settings with Liftoff for the best experience and for the simulator to be more realistic.
In the menu, go to Options > Game.
If you are a very beginner trying the first-time simulator, enable “God Mode.” If not, disable it to simulate drone crashes.
I enabled “show propellers in first-person view” for the simulator to be more realistic as with an FPV drone.
The “on-screen” display should be “On.” You will need your OSD to get used to the drone specs and numbers in the game.
“Show joystick overlay in OSD” should be on as well, for the joysticks to simulate your input and get used to how your RC input responds in-game.
“Battery Simulation” should also be active. Flying for so long in Liftoff would be difficult for the battery to deplete. It is just not realistic, but a nice thing to have.
If you are learning freestyle, enabling “Always Detect Stunts” is best, which will apply even on free flight maps.
The prop wash I kept at 42%
“Show drone trails, game triggers, race guides, and festival items” are just a few things I kept on, which don’t affect much the functionality of the game and make it more realistic, but they don’t do anything bad, in special the “Show Race Guides” which will aid you when learning to race.
You can also set your unit system as per your preferences. I have it set on “Meters.”
» READ MORE: 5 Best FPV Drone Simulators
Best rates for Liftoff simulator
One of the most important settings you will have to change in the Liftoff simulator in order to have a fantastic experience training is rates.
If you set custom rates, adjust them as your like, and play with them. You will get used to using the muscle memory that will nicely transfer when flying a drone in real life with the same or similar rates.
That’s why, without a doubt, you should change the rates in Liftoff.
» READ MORE: Pinch or Thumbs When Flying FPV Drones?
But how to change rates in Liftoff Simulator?
There are two ways you can implement them:
A. Directly in the simulator when you’re flying your quad:
- When flying your drone, press the ESC key and go to Flight Controller Settings
- Make a copy of the drone when requested (if you don’t already have one). You can change the name later in Workshop.
- From the dropdown menu, select “ACTUAL.” Now we use “Actual” rates, but we have some good recommended “Betaflight” ones
- Modify your rates as per the values we recommend.
B. Change rates from the main menu:
- Go to Tools > Workbench and select Drone Editor
- Choose a drone you like and pick it
- In the editor, click on “Edit Flight Controller Settings.“
- Select from the dropdown menu “ACTUAL” for the selected model (or Betaflight for the second table down)
- Choose our rates or any you would like.
Now, the following rates will have a less sensitive center stick for the drone to react smoothly for accurate flights. Towards the extreme stick ends of your controller, the drone will rotate more aggressively.
With these rates, the drone reacts at 800 deg/s, which is perfect for freestyle.
As an anecdote, these rates are fantastic for smooth and accurate flights and freestyle.
| ACTUAL RATES | Center Sensitivity | Max Rate | Expo |
|---|---|---|---|
| Roll | 140 | 800 | 0.85 |
| Pitch | 140 | 800 | 0.85 |
| Yaw | 140 | 800 | 0.85 |
Now, we do have some more rates to share with you that are fantastic for Liftoff Simulator; but be aware these are a real challenge.
The following rates are “Betaflight” and are a modified version of what Mr. Steele uses (or used to use).
If you know his videos, you also know he is flying at extreme rates at over 1100 degrees per second. He is kinda unique with his rates and PID settings on his quad.
Therefore, the following ones are lowered and readjusted, but still, for a beginner, the stick input will be extremely sensitive.
I don’t recommend using them unless you know the basics of how to fly an FPV drone in the Liftoff Simulator.
| BETAFLIGHT RATES | RC RATE | RATE | RC EXPO |
|---|---|---|---|
| Roll | 2.13 | 0.20 | 0.69 |
| Pitch | 2.13 | 0.20 | 0.69 |
| Yaw | 1.40 | 0.65 | 0.15 |
Once more, don’t forget, these are “Betaflight” rates and not “Actual“; therefore, don’t forget to change to “Betaflight” from the dropdown menu as stated above.
» READ MORE: Best Rates for Liftoff Simulator
What camera angle is the best to fly FPV in Liftoff?
If you want to start learning in the Liftoff simulator, it is best to learn at different camera angles.
As a rule of thumb, merely a guideline, I will recommend the following camera angles:
- Freestyle: 25-30 degrees
- Cinewhooping: 15 degrees or less
- Free Flights: 20 to 35 degrees
- Racing: 45 degrees
I love to fly at 25 degrees camera angle that nicely combines a smooth freestyle and free flights, even allowing me to hover in place and see the ground without issues.
Try to start with 25 degrees and move up and down the camera angle until you find your perfect one for the type of flight you want to learn in Liftoff.
To change the camera angle in Liftoff, press the UP or DOWN arrows on your keyboard while flying your drone in the simulator.
» READ MORE: What is the Best Liftoff Simulator Camera Angle to Learn FPV
How to fly FPV in Liftoff Multiplayer?
To be able to fly in Multiplayer with others, you will need a stable internet connection with low latency so you won’t have trouble flying your drone.
Moreover, you need to login into your account to save the progress.
On the top right corner, you have your Steam name (if you have purchased the simulator through Steam).
Press “Sign In“
if you already have a Liftoff Pro account, please skip the following steps. If not, it is time for you to register an account with Liftoff Pro
- Press “Create a Liftoff Pro Account.” Now you will be redirected to the registration process.
- Follow the steps given.
- I think you have to confirm your email once you created an account. It was a long time ago for me.
I have spent many hours without being logged in and lost a lot of progress. If you care about this, you should just keep your account logged in.
Now you can play in Multiplayer mode.
» READ MORE: How to Get Smooth and Cinematic FPV Drone Footage (Guide)

