How to Get Started with VelociDrone (Beginner Guide)
VelociDrone is one of the best FPV simulators out there. Here's a guide to help you get started with it.
VelociDrone. What a great FPV Simulator. According to many pilot reviews, including myself, VelociDrone is the top of the hat, the simulator number 1 in FPV, relating to sim physics, drone mechanics, throttle management, and response.
So, if you got VelociDrone, you’re in for a treat.
But you’ll have to get started with the installation process, setting up and changing a few settings to make the simulator, which is an unusual approach.
That’s why we created this guide on how to get started with VelociDrone.
Acquiring VelociDrone
VelociDrone is one of the few simulators that cannot be acquired on Steam.
We love buying all the simulators on Steam for simplicity, where data is regularly backed up and training hours are registered. Also, installing and uninstalling a simulator on Steam is a 1-step process – click to install (or uninstall)
However, this is not the case for VelociDrone.
When I acquired my VelociDrone license, I got it from their official website, Velocidrone.com. If you’re looking into it, that’s the place to get and nowhere else (as for now) – it’s the safest way.
Note: This guide on how to get started with VelociDrone is a non-sponsored or affiliate post.
Of course, you will have to create an account with them – not only to buy the simulator and/or the add-ons, but you will need the login details to play the simulator.
So be aware of the username/password you put when creating your velocidrone account.
Now you know the drill. You have to do further steps to buy the simulator (if you haven’t already) with your available payment options.
Installing VelociDrone (and uninstalling, if needed)
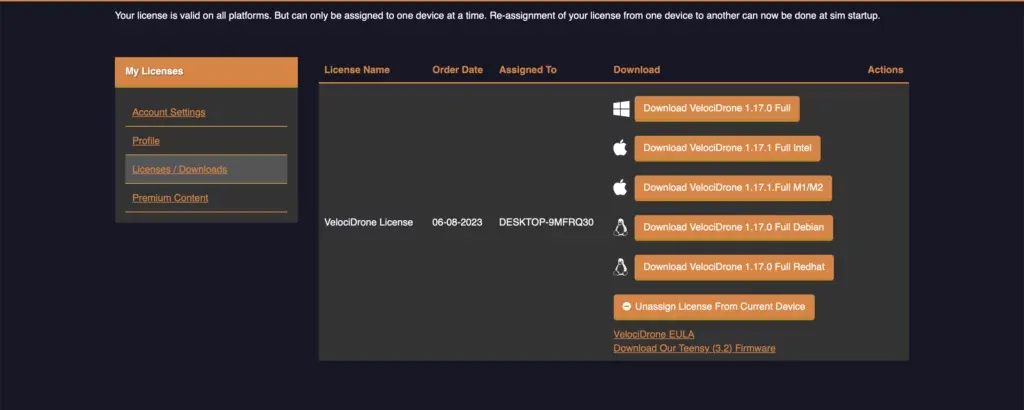
Now that you have VelociDrone, congratulations! You’re in for a threat.
This simulator can be played on Windows PC, Mac Computers (M1/M2 + Intel), and Linux (Debian & Redhat)
Now, depending on what system you have, press to download the game there. This will download a launcher in a folder with a readme.txt
The notes from the readme.txt may be different on each platform. So, for Mac, it warns me not to start installing the simulator from the download folder as it may cause problems.
Please carefully read the readme.txt you have received. In fact, I can share those with you but you may want to look on the ones you obtained in case they get updated.
There are no instructions on how to do it on Linux. I guess it’s a straightforward process there.
See VelociDrone? Why not take the Stream approach and optimize the simulator for there? It would be the most uncomplicated process to install it.
Once more, depending on your operating system, it’s a pretty complex installation, and I’ll warn you not to skip reading the readme.txt you receive when you download your OS VelociDrone version.
But if you’re looking to uninstall VelociDrone for some reason, that’s another trouble with no instructions. I have done a quick guide on Mac on how to do it, if you’re looking for it.
Entering the simulator
Again, congratulations. You have reached this step and installed VelociDrone. It is time to use it.
If you purchase add-ons, they are installed automatically. I haven’t taken any additional steps to install them.
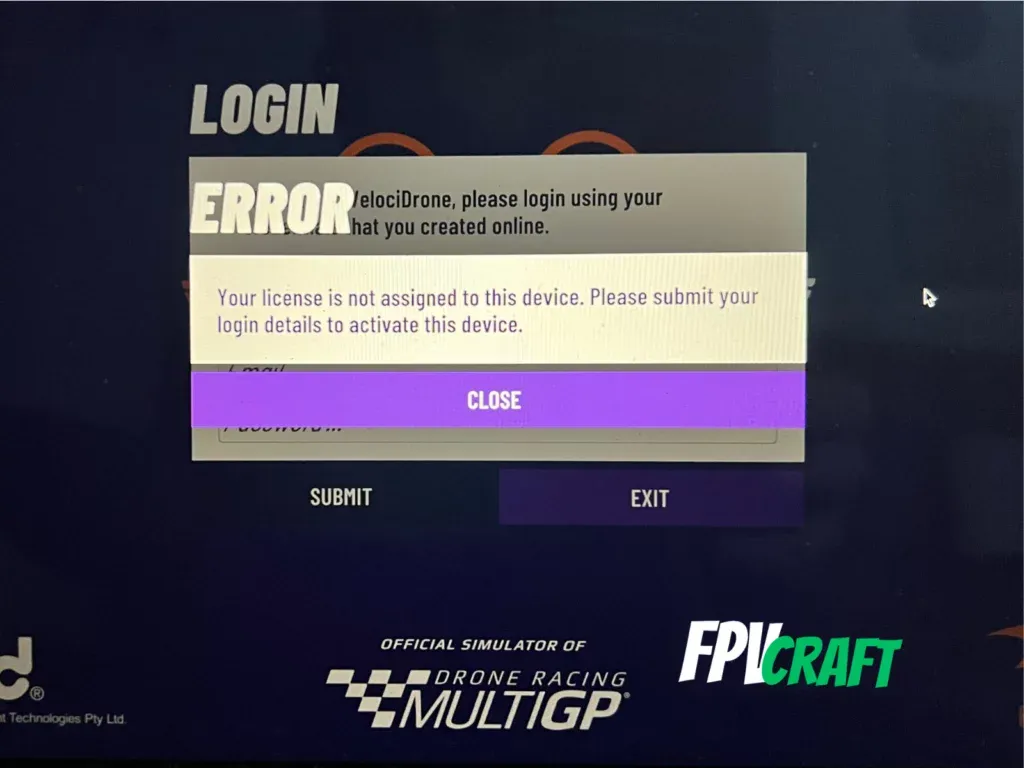
When you enter the simulator, you’ll be asked to login with the Username and Password of your VelociDrone account you created when you purcashed this simulator.
Once you do, the license will be assigned to your device, and you will reach the main menu.
Like every simulator, the main menu may have many options. So, the next step is to calibrate your FPV remote controller so you can start practicing.
» RELATED: 5 Best FPV Drone Simulators
Calibrating your remote controller
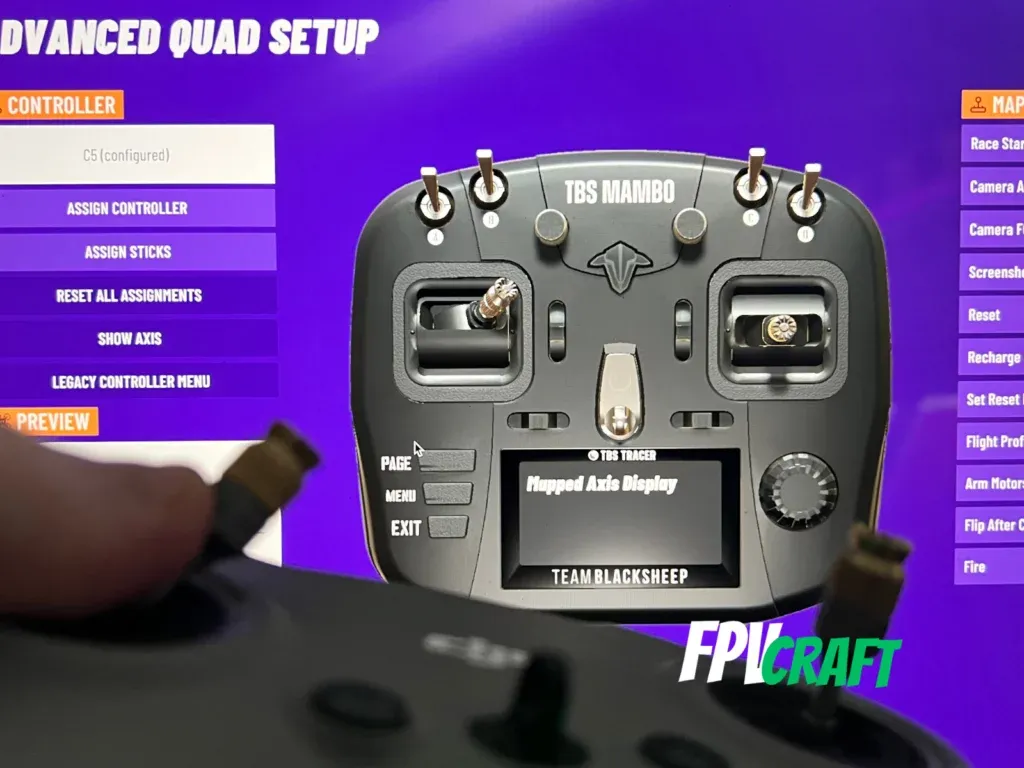
Now, before anything, as we’ve said, we need to calibrate the remote controller.
So, I guess you have already connected it before starting VelociDrone. It should work (get recognized) even if you turned on and connected your controller after you got into the game, but if not, exit the game, connect the controller, and enter again.
Within the VelociDrone main menu, go to “Controller,” situated at the bottom of the screen.
Furthermore, click “Assign Controller” and move a stick for the controller to be recognized in VelociDrone.
» RELATED: VelociDrone with DJI FPV Remote Controller 2
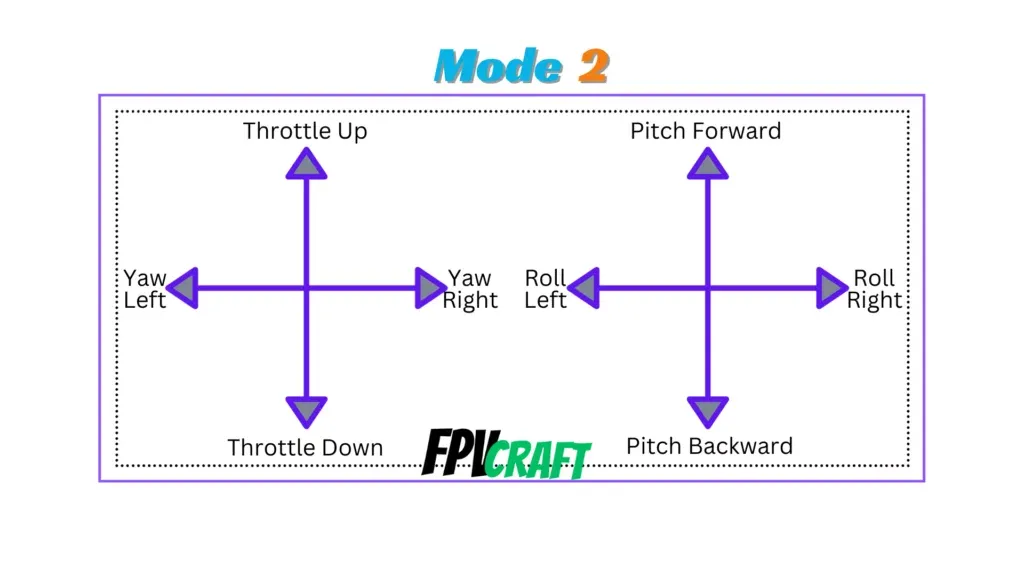
Now, the last step would be to press “Assign Sticks” and follow the on-screen process of calibration. If you’re struggling to remember when asked to move each individual axis (throttle, roll, yaw and pitch) into a direction, here’s an image to help you recognise these axes (in mode 2).
Well, that would be it for assigning the controller and calibrating it in VelociDrone.
Settings to change within VelociDrone
The next part is to adjust the game settings and twitch a few things here and there to optimize it both for your computer and a more realistic training scenario.
From the Options > Main Settings, we shouldn’t change much and leave it as it is unless you have an Xbox or PlayStation controller where the throttle axis will auto-center. In that case, enable “Use Gamepad Mode.”
Graphics
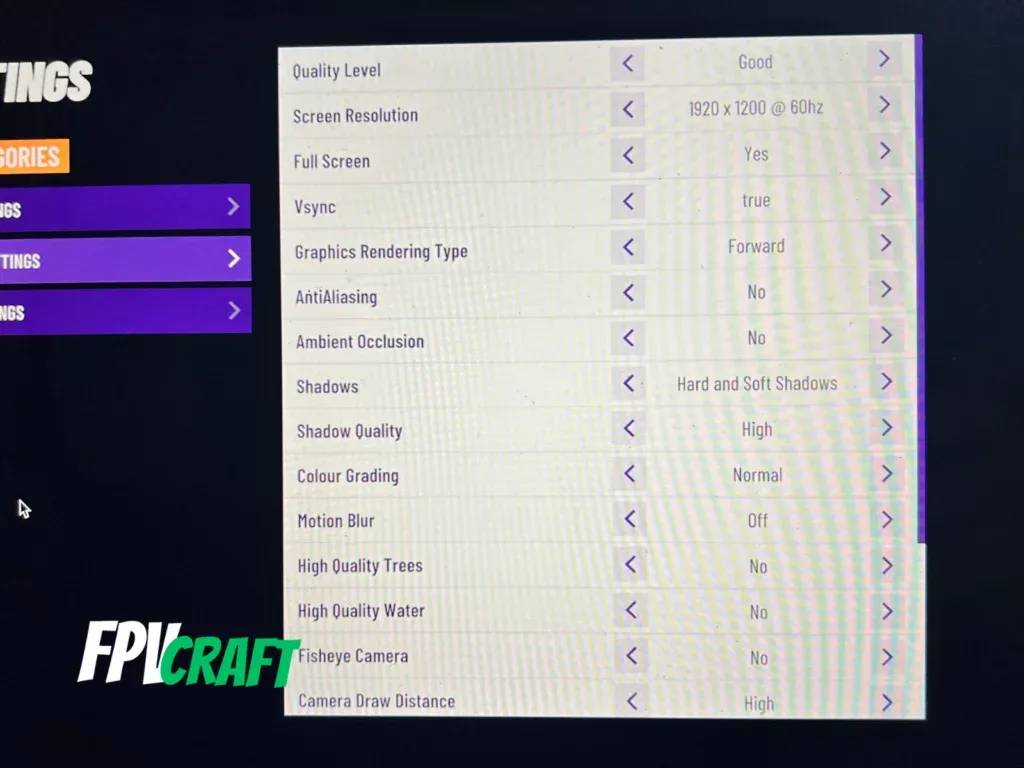
The graphics can be found on Options > Screen Settings and should always be adjusted per your computer configuration.
If you have a lower-end computer, you should focus on acquiring more performance for better FPS. A higher-end computer with a dedicated video card can take advantage of greater graphics (though they’re not great).
If you have a Mac, it’s better to optimize it so it doesn’t overheat (especially if you have the “Air M2” version with no active cooling) and to ensure proper performance.
Some of the things I have on my MacBook Air M2 are:
- Resolution: 1920×1200@60hz
- Full Screen: Yes
- V-Sync: Yes (for smoother gameplay if you reach your screen Hz in the equivalency of FPS)
- Fisheye Camera: No (unless you love those effects)
- Camera Draw Distance: High
Some other settings are more or less basic and must always be changed per your computer configuration.
Other than that, there’s not much you have to change in terms of graphics to optimize it for smoother performance.
In fact, VelociDrone is well known to be an FPV simulator that will require little graphic requirements to run smoothly, and it’s well-optimized on all these platforms.
» RELATED: Best Settings for Velocidrone
Your Drone Settings
From within the “Option,” we have “Quad Settings.” Those are the general settings you can set for all the quads, and there’s not much to change there unless you look for something extra (such as increasing the physics CPU or changing the camera field of view).
What we need to look for is the individual drone settings.
Therefore, the next step would be to go to Singleplayer > Add a Quad > Pick one as per your liking style.
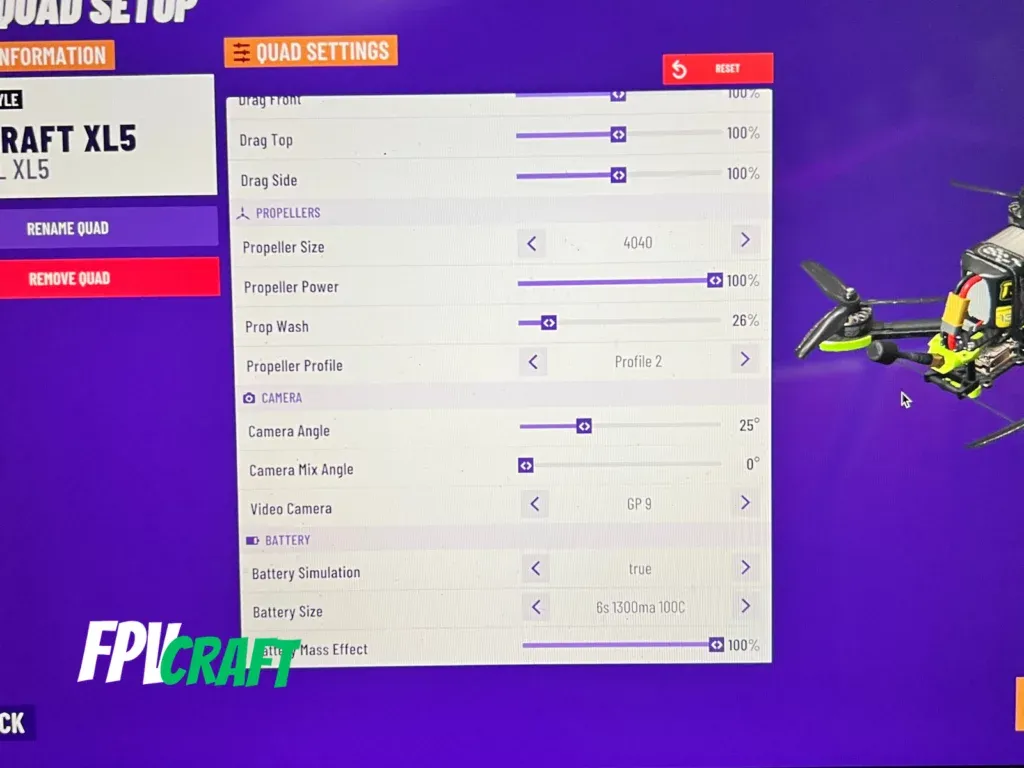
What I would love to change here are the following:
- Propeller size: I love how 4040 responds on a 5-inch quad, but this is a personal preference.
- Camera Angle: 25 degrees – that’s what I’m used to having most of the time
- Camera Mix Angle: ALWAYS N0
- Video Camera: Add a GP9 or similar action camera to emulate flying a quad with a GoPro on it. Believe me, it is pretty accurate!
- Battery Simulation: TRUE
- Battery Size: 6S 1300mAh 100C – this will be different depending on your quad. But pick a battery, though.
- Battery Mass Effect: 100% – you need to feel the weight of heavier batteries and all batteries on your quad
Depending on your chosen drone, you can have a fantastic experience flying a quad in VelociDrone with these or similar settings.
Rates
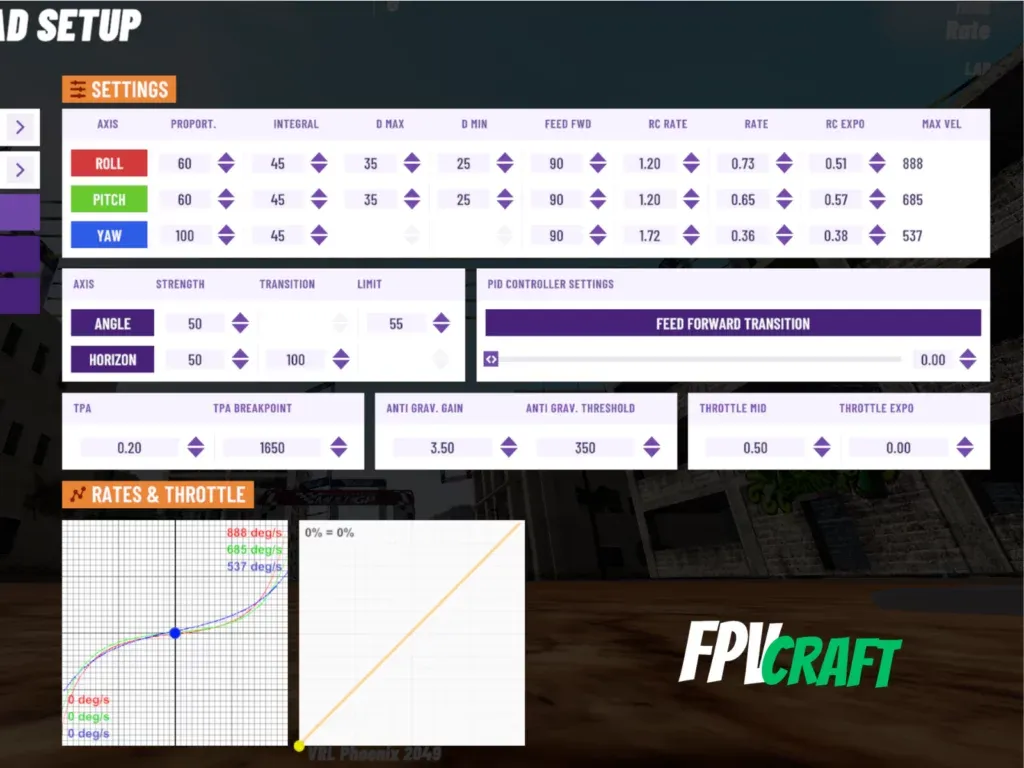
To get to rates, you will have to start a map.
So you’ve done your quad settings and added your quad.
The next step would be to press “Continue” and pick a map.
After you are on the map with your drone, press the “ESC” button and go to “Advanced Drone Setup.” There you have all your rates.
Depending on your preferences, you can change and copy any rates you like. I use a derivate from LeDrib’s rates that fit my profile and preferences. Believe me, they’re reasonable rates.
You can see the above screenshot or follow the table below:
| Betaflight Rates | RC RATE | RATE | RC EXPO |
|---|---|---|---|
| ROLL | 1.20 | 0.73 | 0.51 |
| PITCH | 1.20 | 0.65 | 0.57 |
| YAW | 1.72 | 0.36 | 0.38 |
Maybe those rates are what I will use for a long time, or maybe I change in time, but all things considered, I want to share with you some great rates I currently use and proved to be excellent.
| AXIS | RC RATE | RATE | RC EXPO |
|---|---|---|---|
| ROLL | 1.85 | 0.63 | 0.72 |
| PITCH | 1.85 | 0.63 | 0.68 |
| YAW | 1.56 | 0.48 | 0.32 |
Now, you have the rates, but they are set to your drone. Save them, and if you’re looking to import them to another drone, all you have to do is press “Copy Rates” and copy this profile.
» RELATED: Best RATES for VelociDrone
Unshared facts about VelociDrone
Many people may struggle with all the settings and changes they have to make to VelociDrone and dealing with the installation setup.
But things do not stop here.
Here are a few facts about VelociDrone that are worth mentioning.
VelociDrone is the simulator to test rates: Whether they’re Betaflight, Actual, or KISS rates, most professional FPV pilots test and adjust them in VelociDrone because it is the most accurate FPV simulator in relation to PID & Tunning
VelociDrone tracks your training hours locally: On my Windows PC, I practice a specific number of hours in VelociDrone, whereas on my Mac, this is different. While I train with different FPV simulators on Steam, I like to keep track of my practice hours, but with VelociDrone, this is difficult. I am also quite confident that if you reinstall the simulator, your practice hours will be reset to zero. That’s a bummer!
Add-ons are essential: You’ll have to pay for them, but you also get many more maps, drones, freestyle quads, and micro drones. So, if you’re into flying micro drones, there’s a great pack that will help you and is an excellent alternative to using Liftoff: Micro Drones.
» RELATED: How to Learn Manual Mode on DJI FPV and Avata

